

Creating a turkey fan mount is the best way to keep the memories alive after a successful hunt. And the memories are that much sweeter when you create the mount yourself. So, choose a kit below and get that memory on the wall!
Turkey Fan Mount - Top Picks
(Full List Below)
Best Overall
Best Artwork
Best Plain Design
- Natural oak plaque
- Laser-engraved turkey
- Engravable brass plate included
- Easy to assemble
- Very Secure
- Walnut wood
- Finished with clear coat
- Lots of different artwork available
- Easy to mount
- Family-owned and operated business
- Easy to mount
- Mounts fan and one beard
- Satin finish
- Engravable brass plate included
Turkey Fan Mount Plaques - Full List

- Natural oak plaque
- Laser-engraved turkey
- Engravable brass plate included
- Easy to assemble
- Very Secure
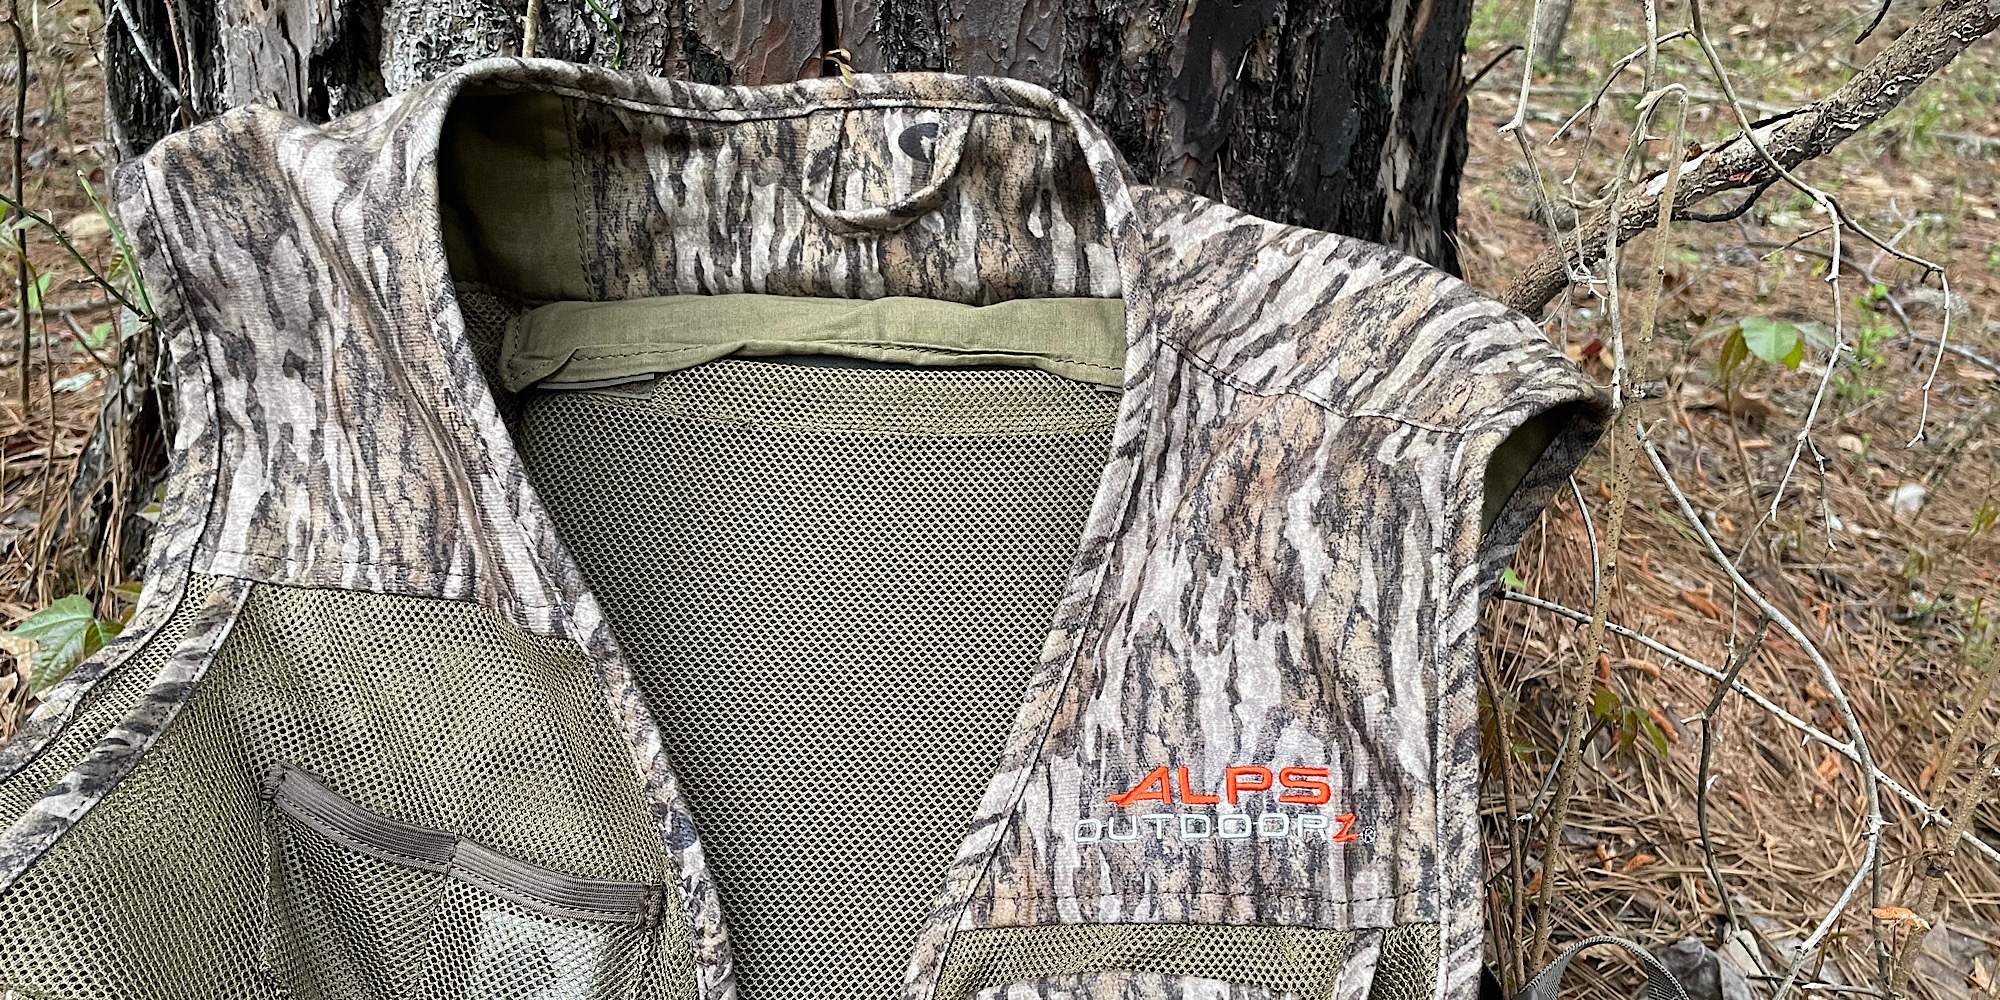
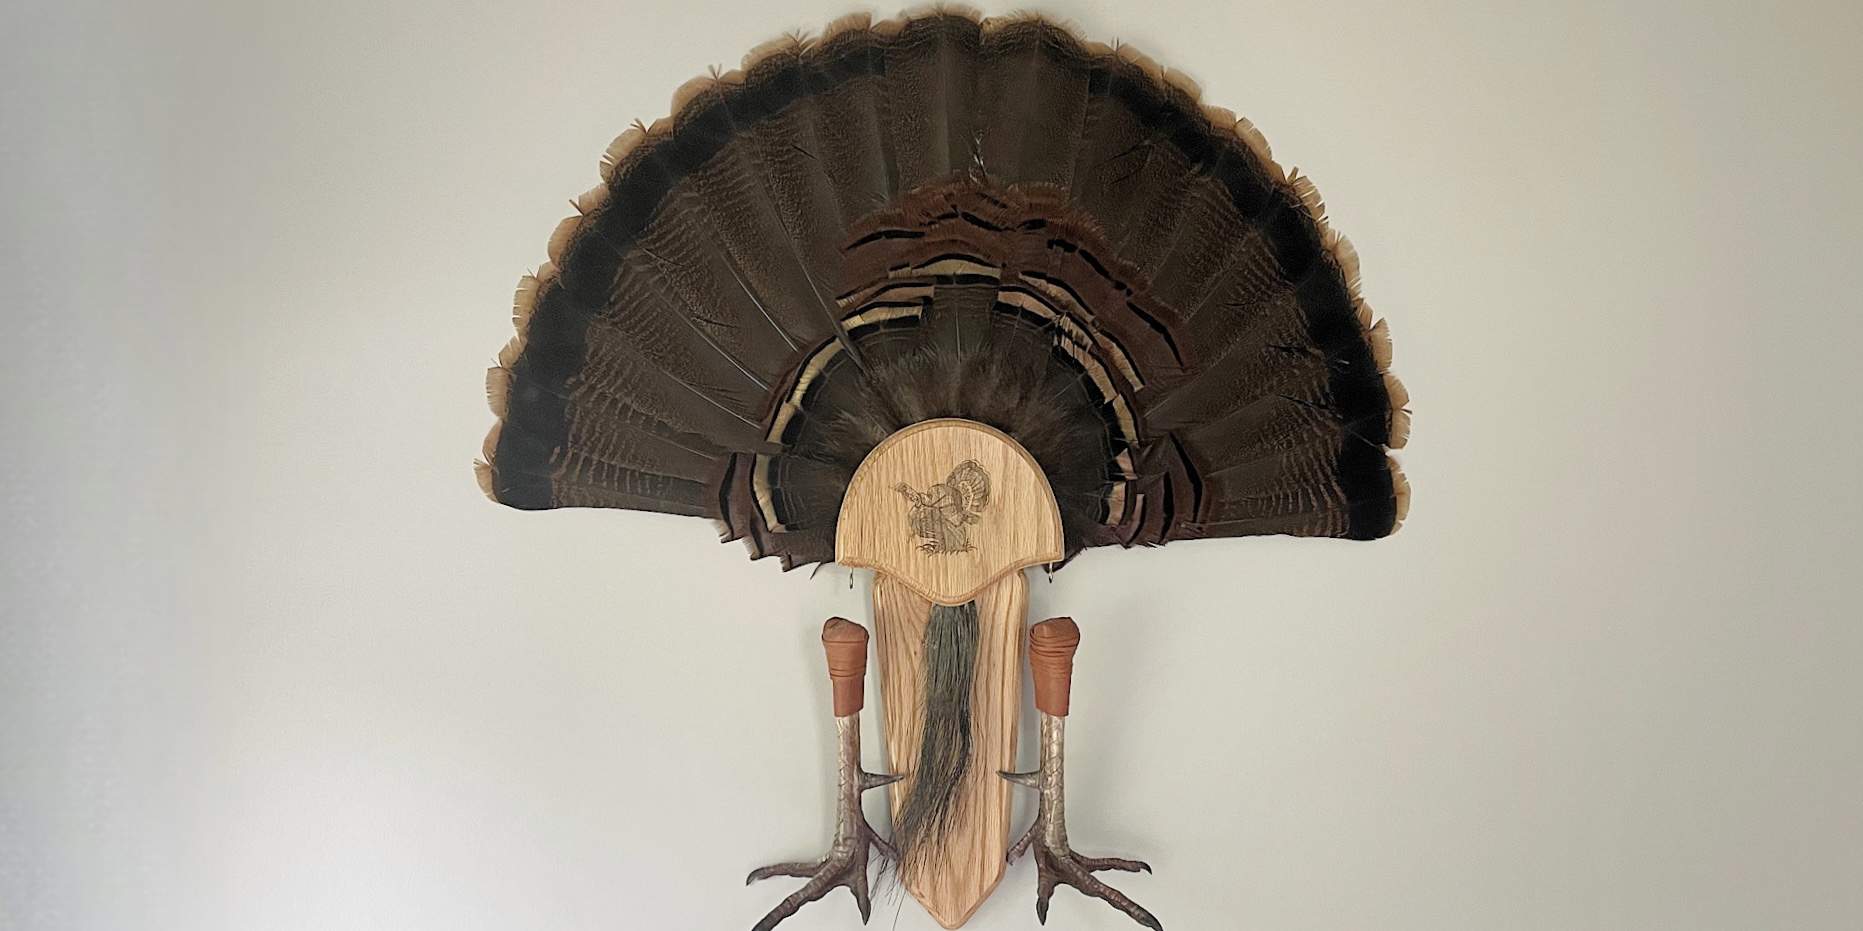
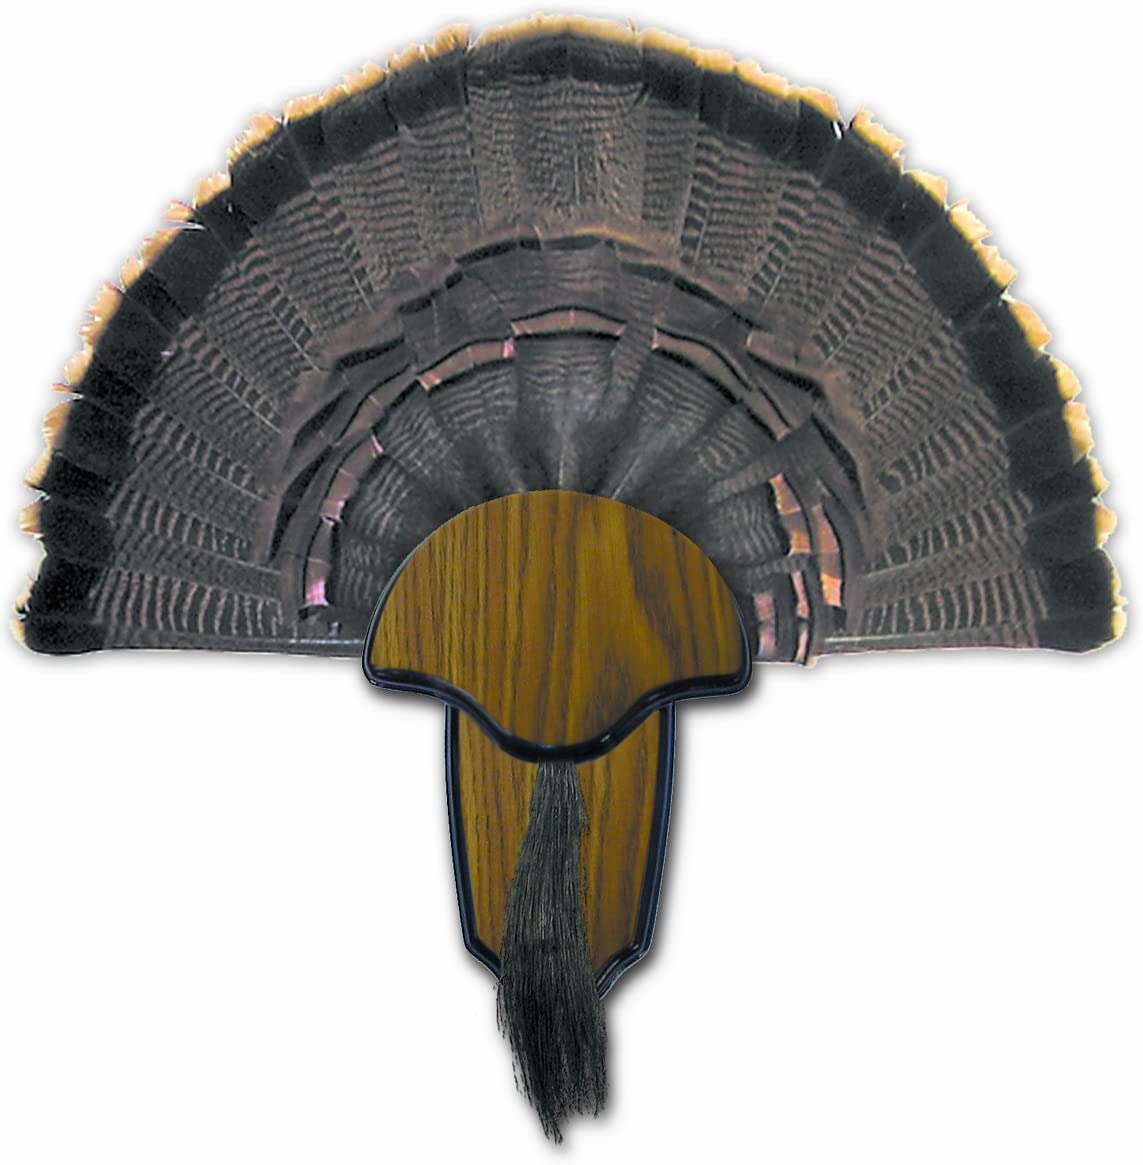
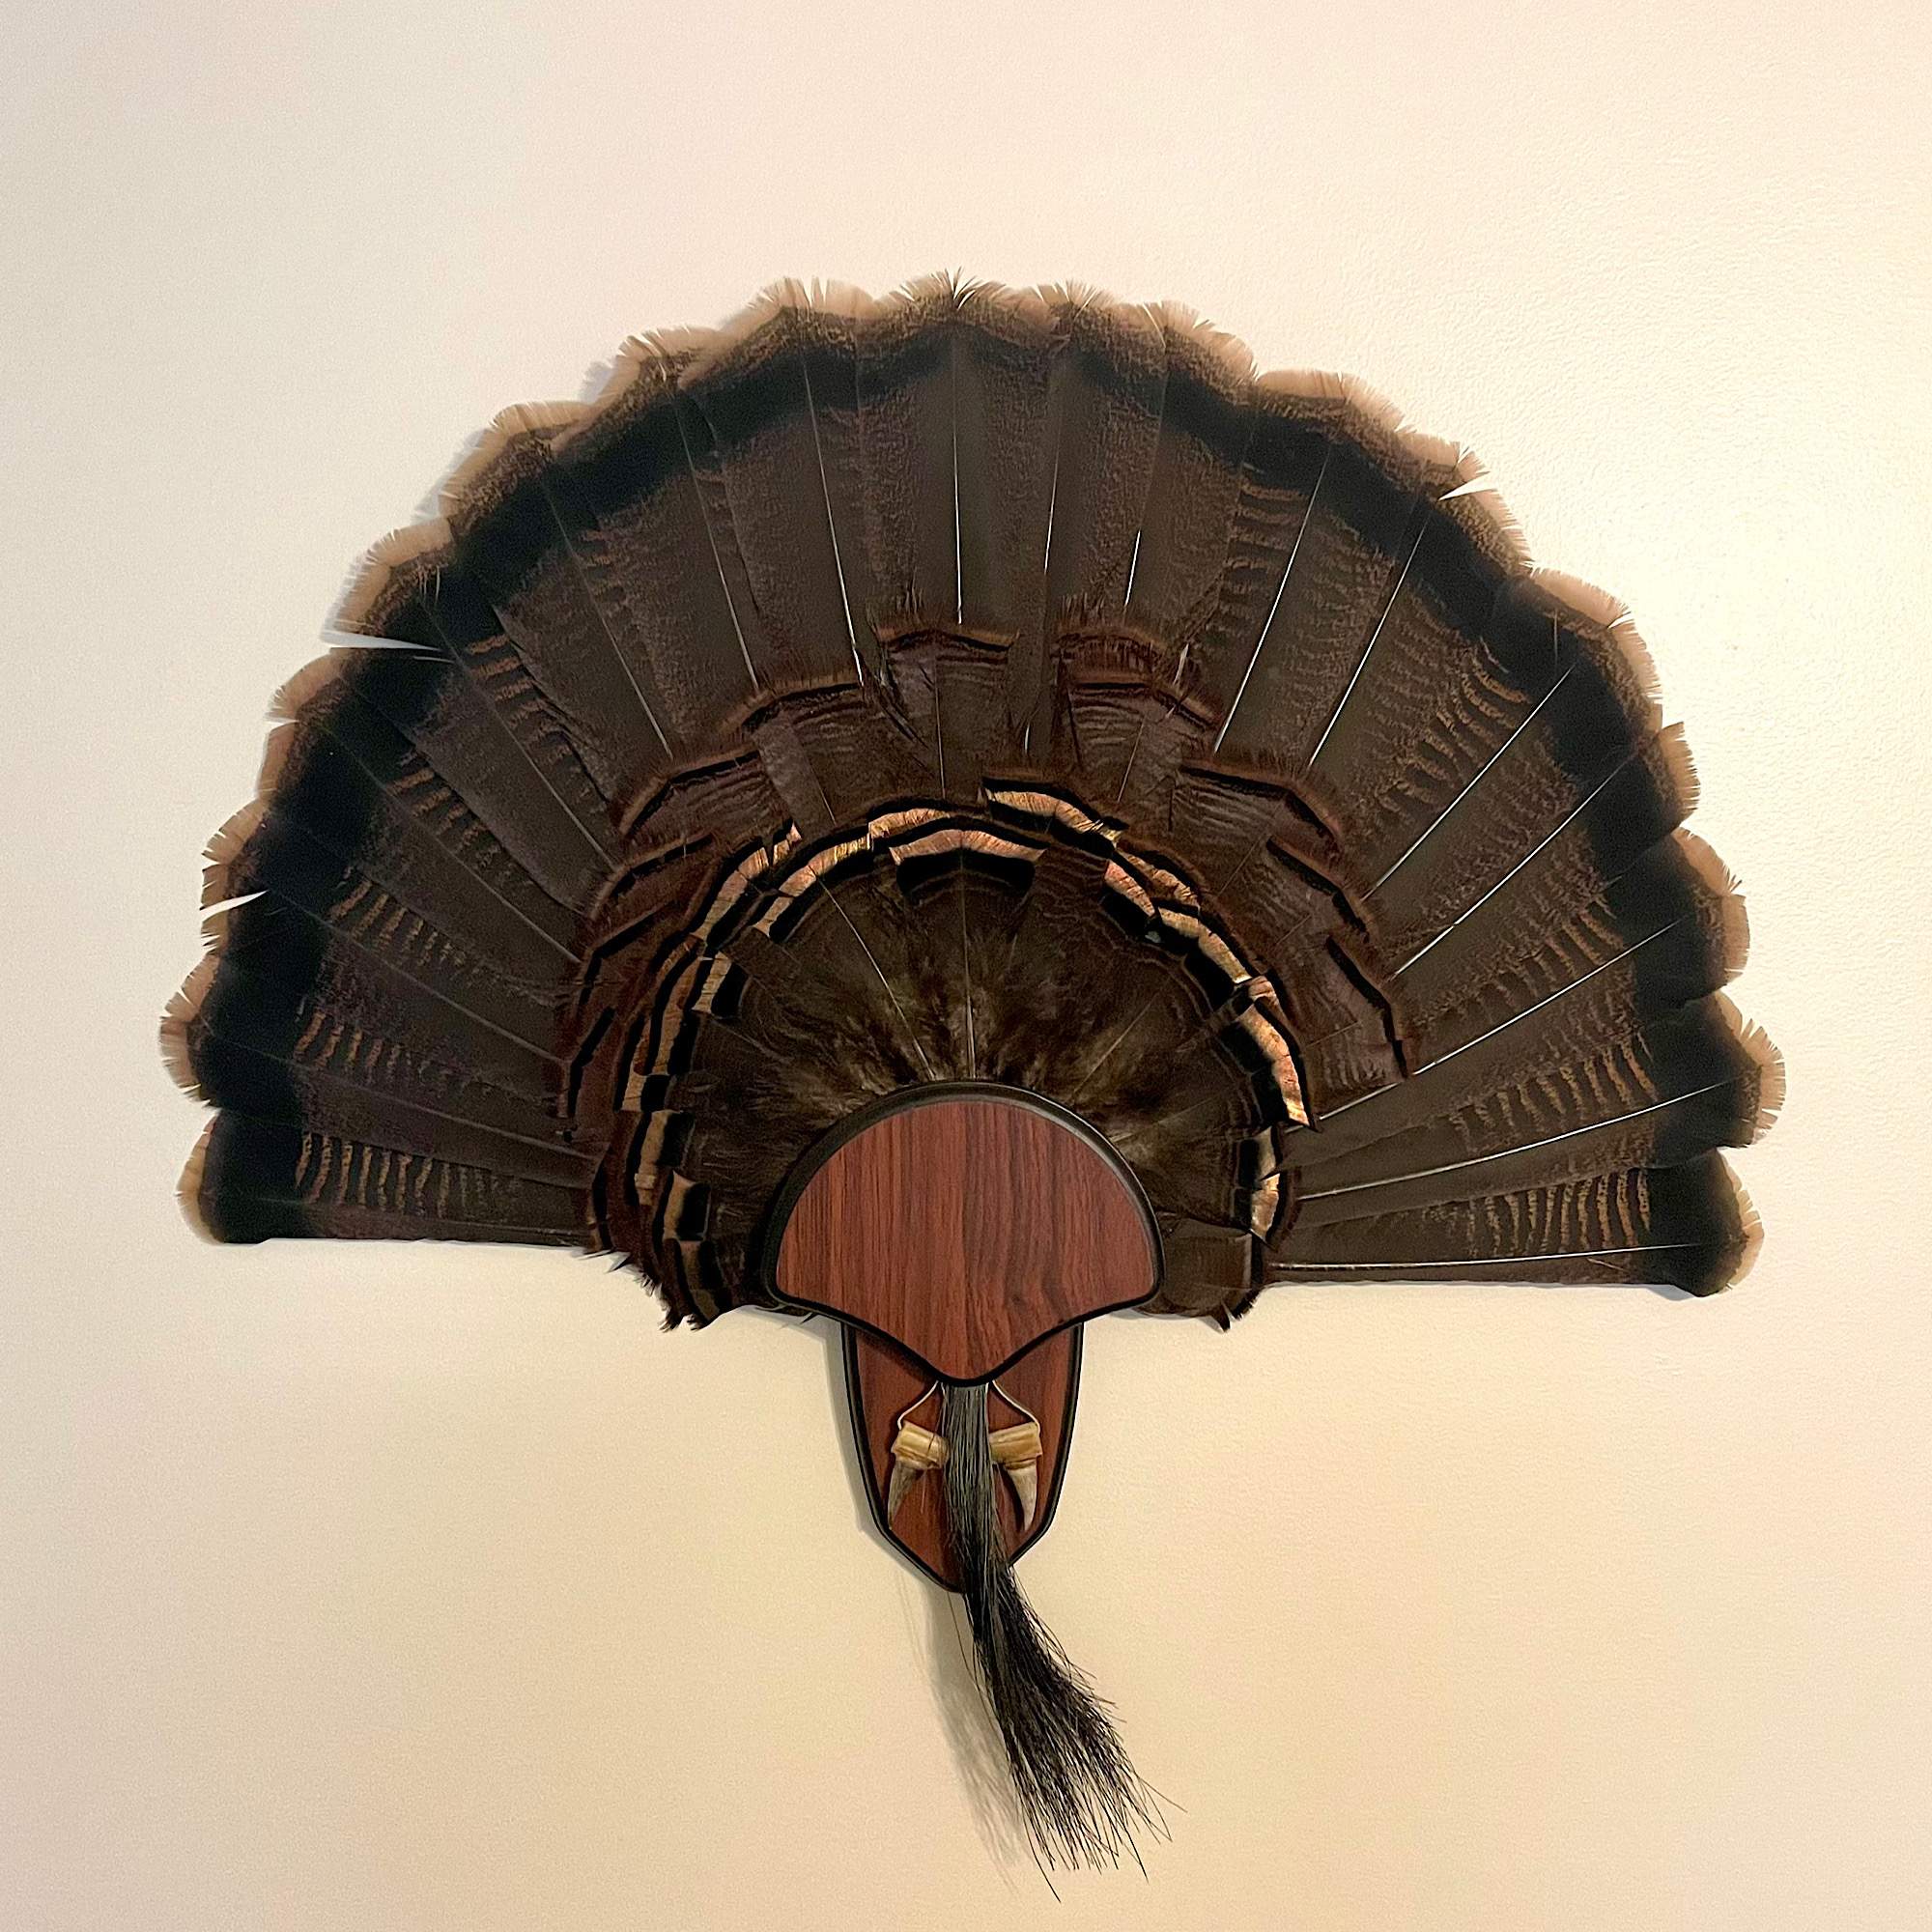
The Hunters Specialties H.S. Strut Three Beard Mounting Plaque is a great mount for displaying your fan and beard.
I’ve used one and love it. It’s made of high-quality, natural oak and features a laser-engraved gobbler in full strut. The detail is very nice.
It’s easy to assemble and comes with everything you need to mount your trophy, including optional hooks to showcase two additional beards. However, I used mine to hang the feet with spurs attached.
I’ve used a couple of different turkey fan mount plaques from H.S. Strut, but this is my favorite.
- Walnut wood
- Finished with clear coat
- Lots of different artwork available
- Easy to mount
- Family-owned and operated business
This Walnut Hollow Country turkey fan mount display is another great option. It’s made of walnut wood and finished with a clear coat that not only protects the wood, but gives it a nice professional look.
They’re also easy to assemble and mount, even for the first-timer.
If you click the button below, you’ll see that there are lots of different turkey artwork options to choose from.
I believe this might just be my next turkey fan mount display.
- Black walnut
- Hand-carved
- Satin finish
- Easy mounting
- Carved turkey tracks
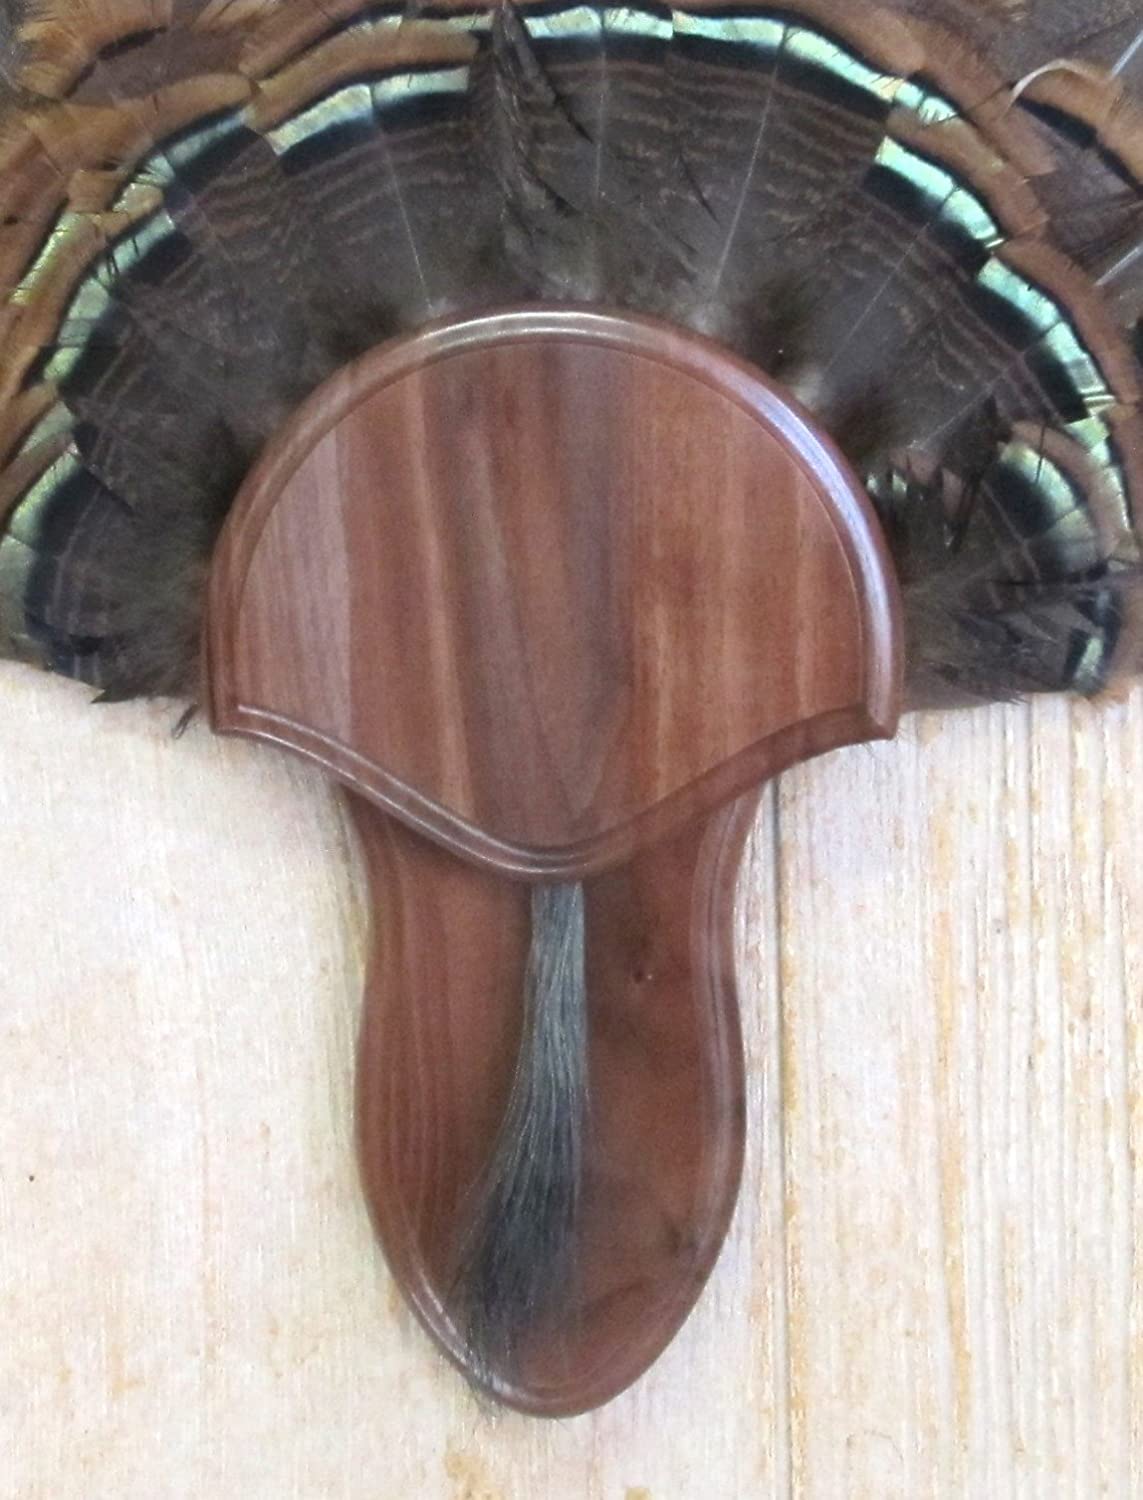
The Taxidermists Woodshop Walnut Carved turkey fan mount gives you a darker wood for mounting. The black walnut plaque is hand-carved and ready to accept a fan and one beard.
Just like the others, it’s easy to mount and features a pair of turkey tracks on the front. Another great turkey mounting plaque.
- Easy to mount
- Mounts fan and one beard
- Satin finish
- Engravable brass plate included
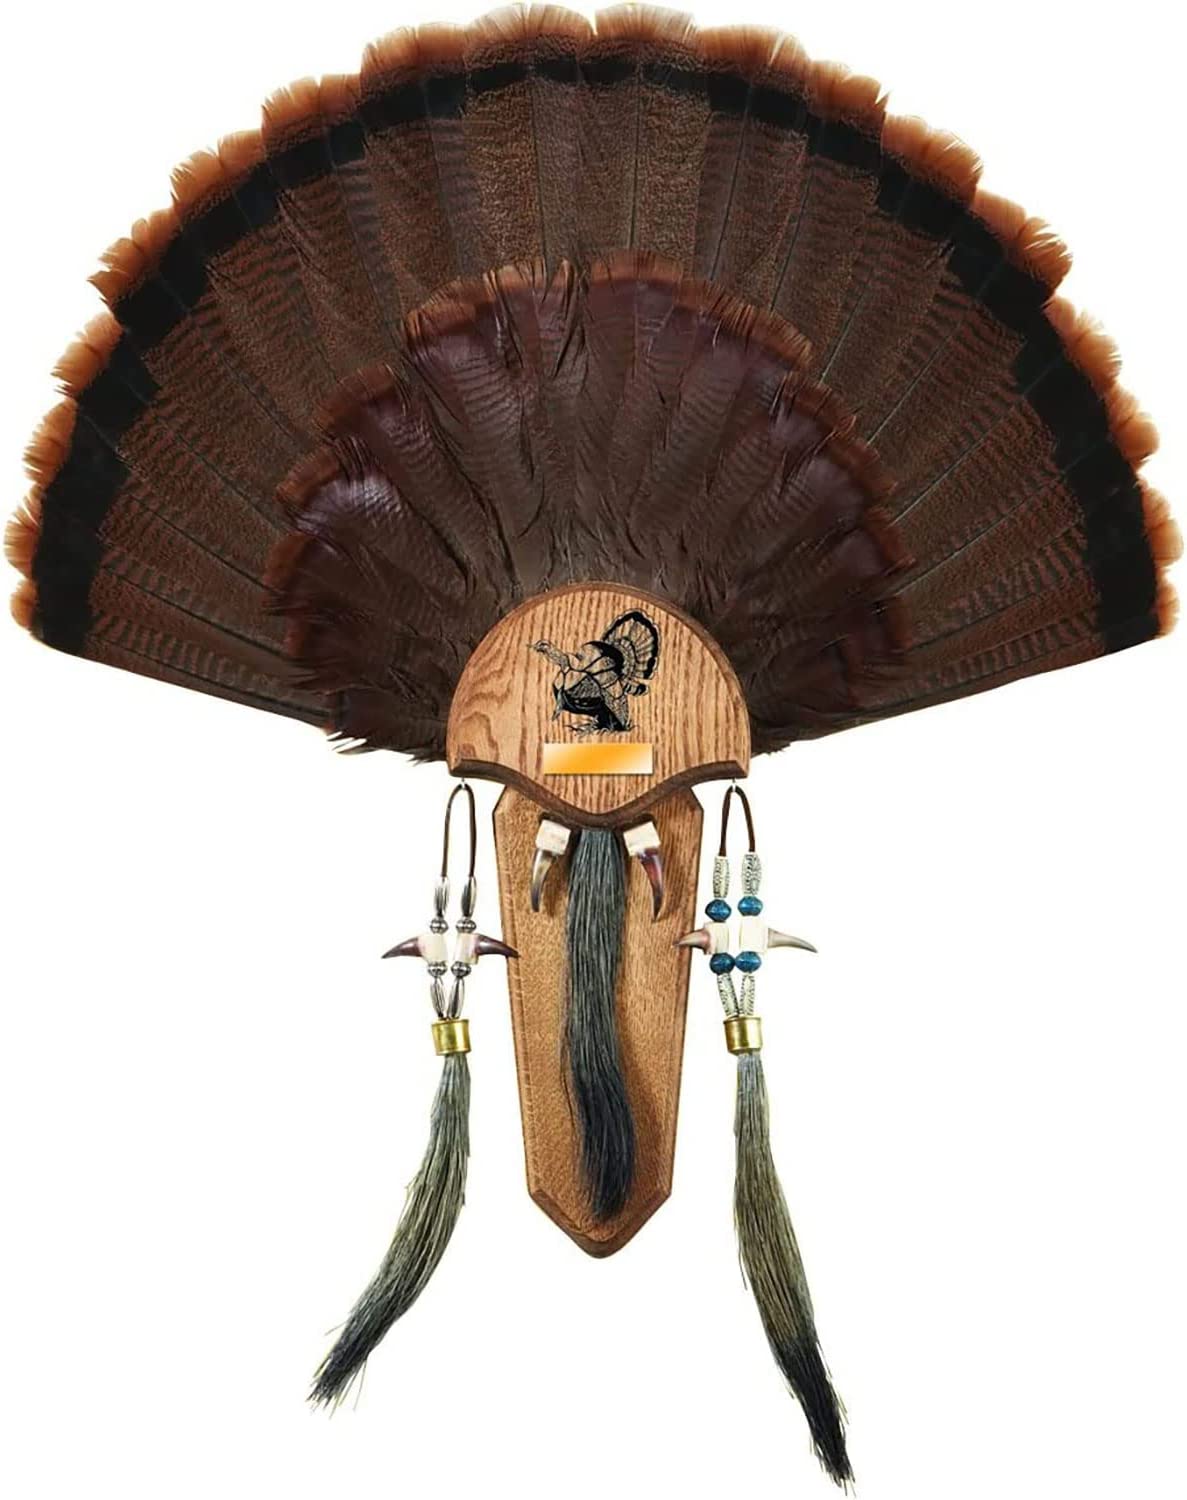
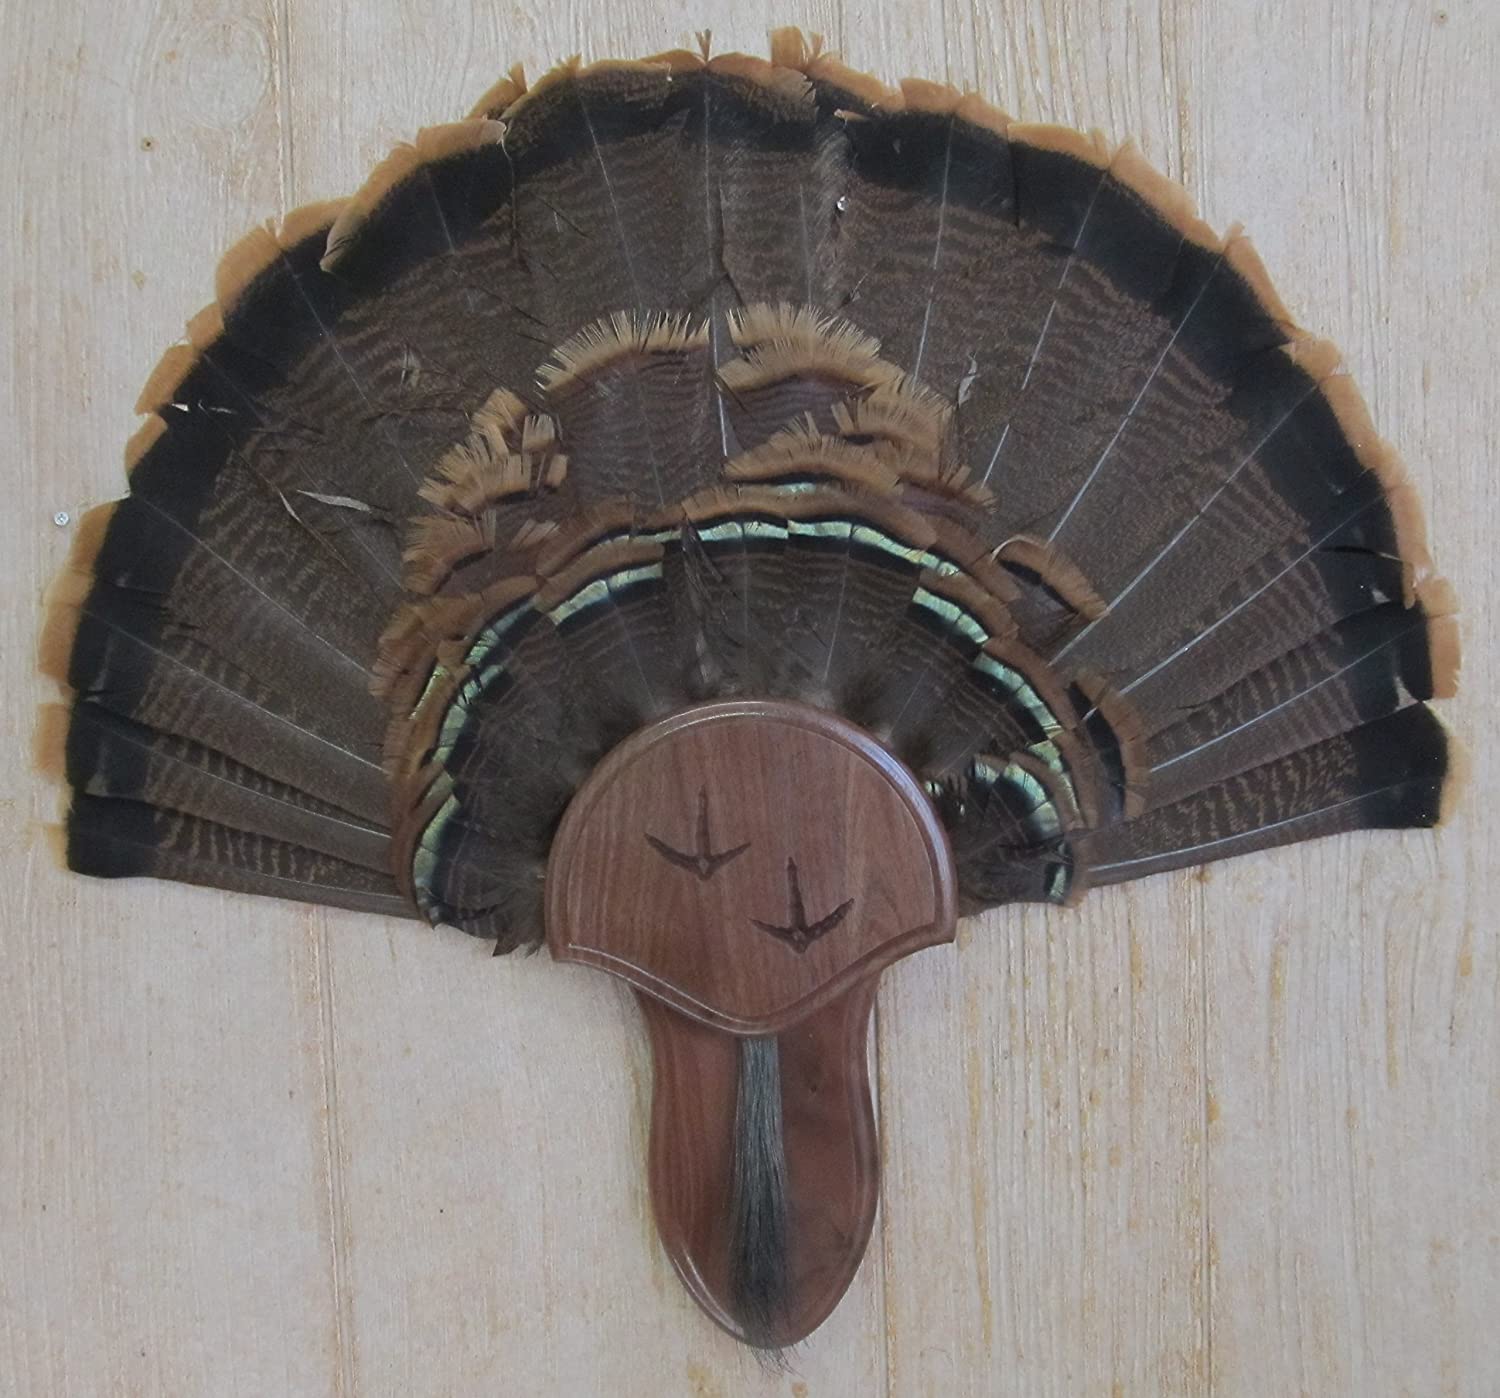
This is one of the first turkey fan mount plaques I ever bought, and it’s still holding the first turkey I ever harvested with a bow. It’s got a really nice look to it, being a darker wood with a nice finish.
The picture doesn’t show it, but it came with an engravable brass plate that can be mounted on the front.
It’s really easy to use and is one of my favorite designs because of its simplicity.
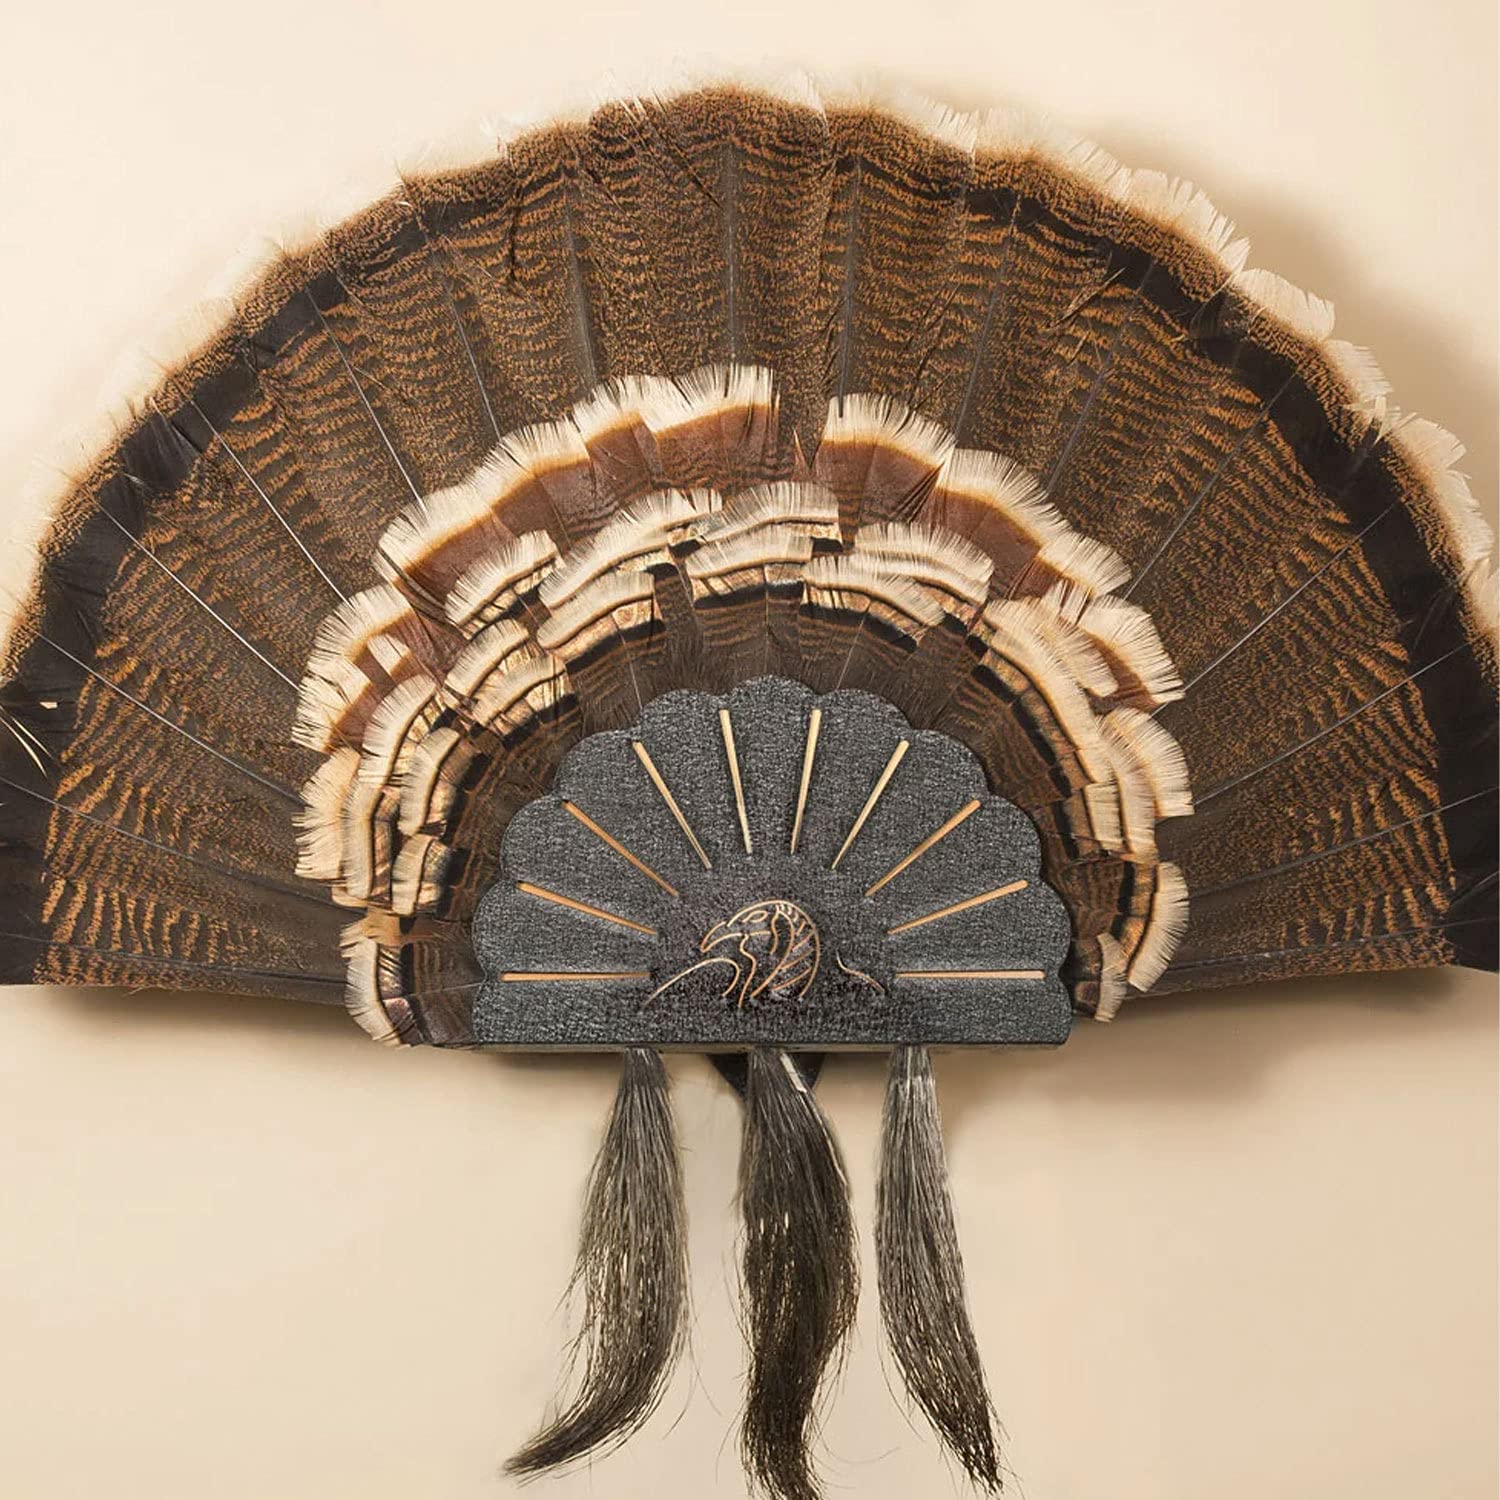
- Metal construction
- Holds up to three beards
- Biggest name in deer skull brackets
- Angle-adjustable
- Can be used on Skull Hooker’s Table Hooker
If you’re looking for a different look for mounting your turkey fan and beards, you found it with the Skull Hooker Turkey Hooker.
Made of metal, it’s going to look different than most other turkey fan mount plaques. Skull Hooker is the largest name in deer skull mounting brackets, so you know this mount is high-quality and well-designed.
And if you’re already using a Skull Hooker Table Hooker or Trophy Tree display, you can easily use this mount on either one for a different display option.
It mounts easy and is capable of holding up to three beards. And it’s finished off with an engraved turkey head on the front.
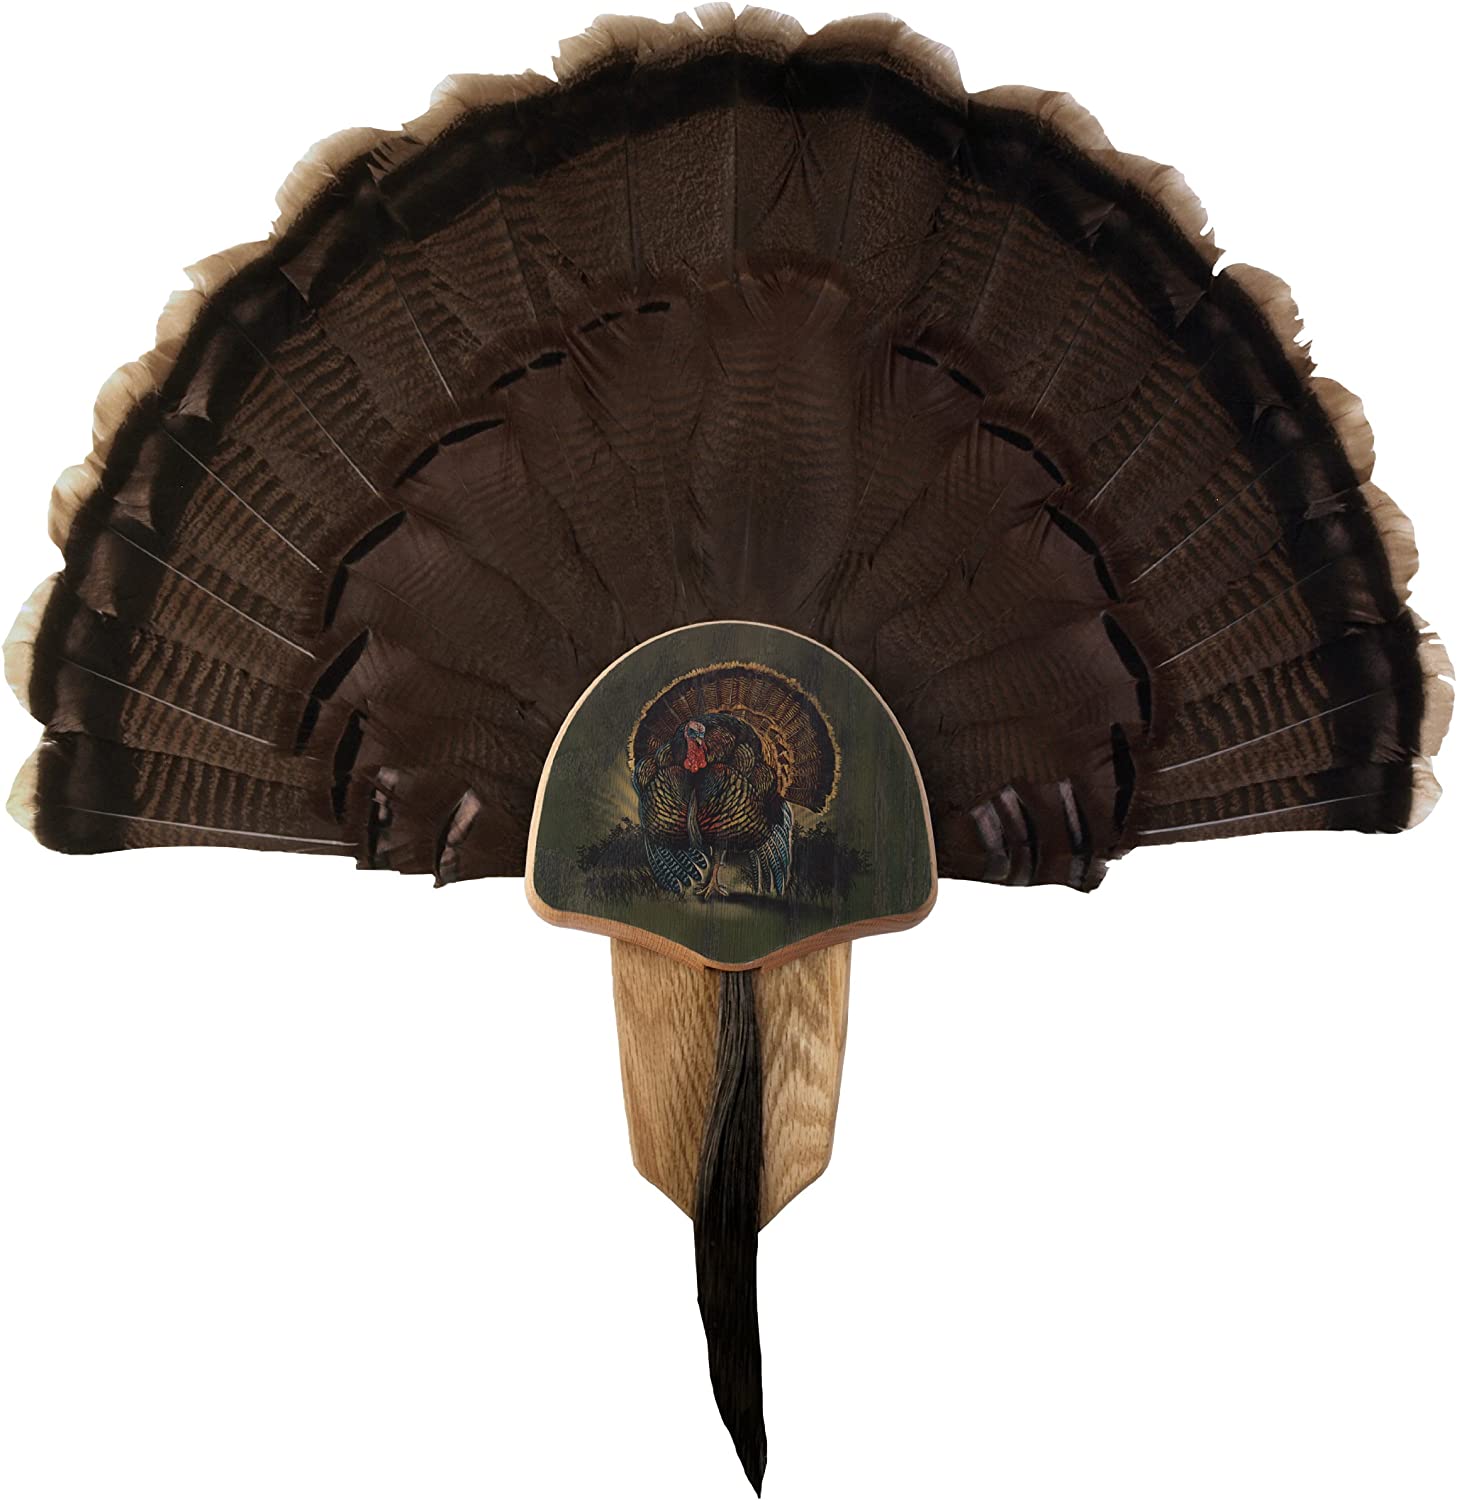
- Black walnut
- Hand-carved
- Satin finish
- Easy mounting
- Plain design
This turkey fan mount is the same as the Taxidermists Woodshop plaque listed in the No. 3 spot above, minus the carved turkey tracks.
Just thought it should be included as an option in case you loved that design, but wished it didn’t have the carved turkey feet.
This one is also hand-carved from Black Walnut with a satin finish.
How To Mount a Turkey Fan
If you’re the do-it-yourself type, as soon as you harvested your turkey, you were probably wondering how to mount a turkey fan.
Although it may seem a little daunting, it’s not, but you do need to get that fan fanned out soon as the kill and keep it that way, even if you’re not going to mount it soon. If you don’t, and you just let it sit bunched up, it will harden and dry out that way.
Fan It Out Early
So, you want to get it cut off at the base of the fan, fanned out, and held into that position either with pins on cardboard or by setting semi-heavy objects on the ends of the feathers to keep them from folding back up.
Don't Forget the Short Feathers
The other thing to remember is to also fan out the shorter feathers toward the base. It’s easy to forget about those because they’re not as pronounced as the large tail feathers.
However, once everything dries out and hardens, you’ll eventually notice that they stayed all bunched up, but it will be too late to fix them.
Trim as Much as Possible
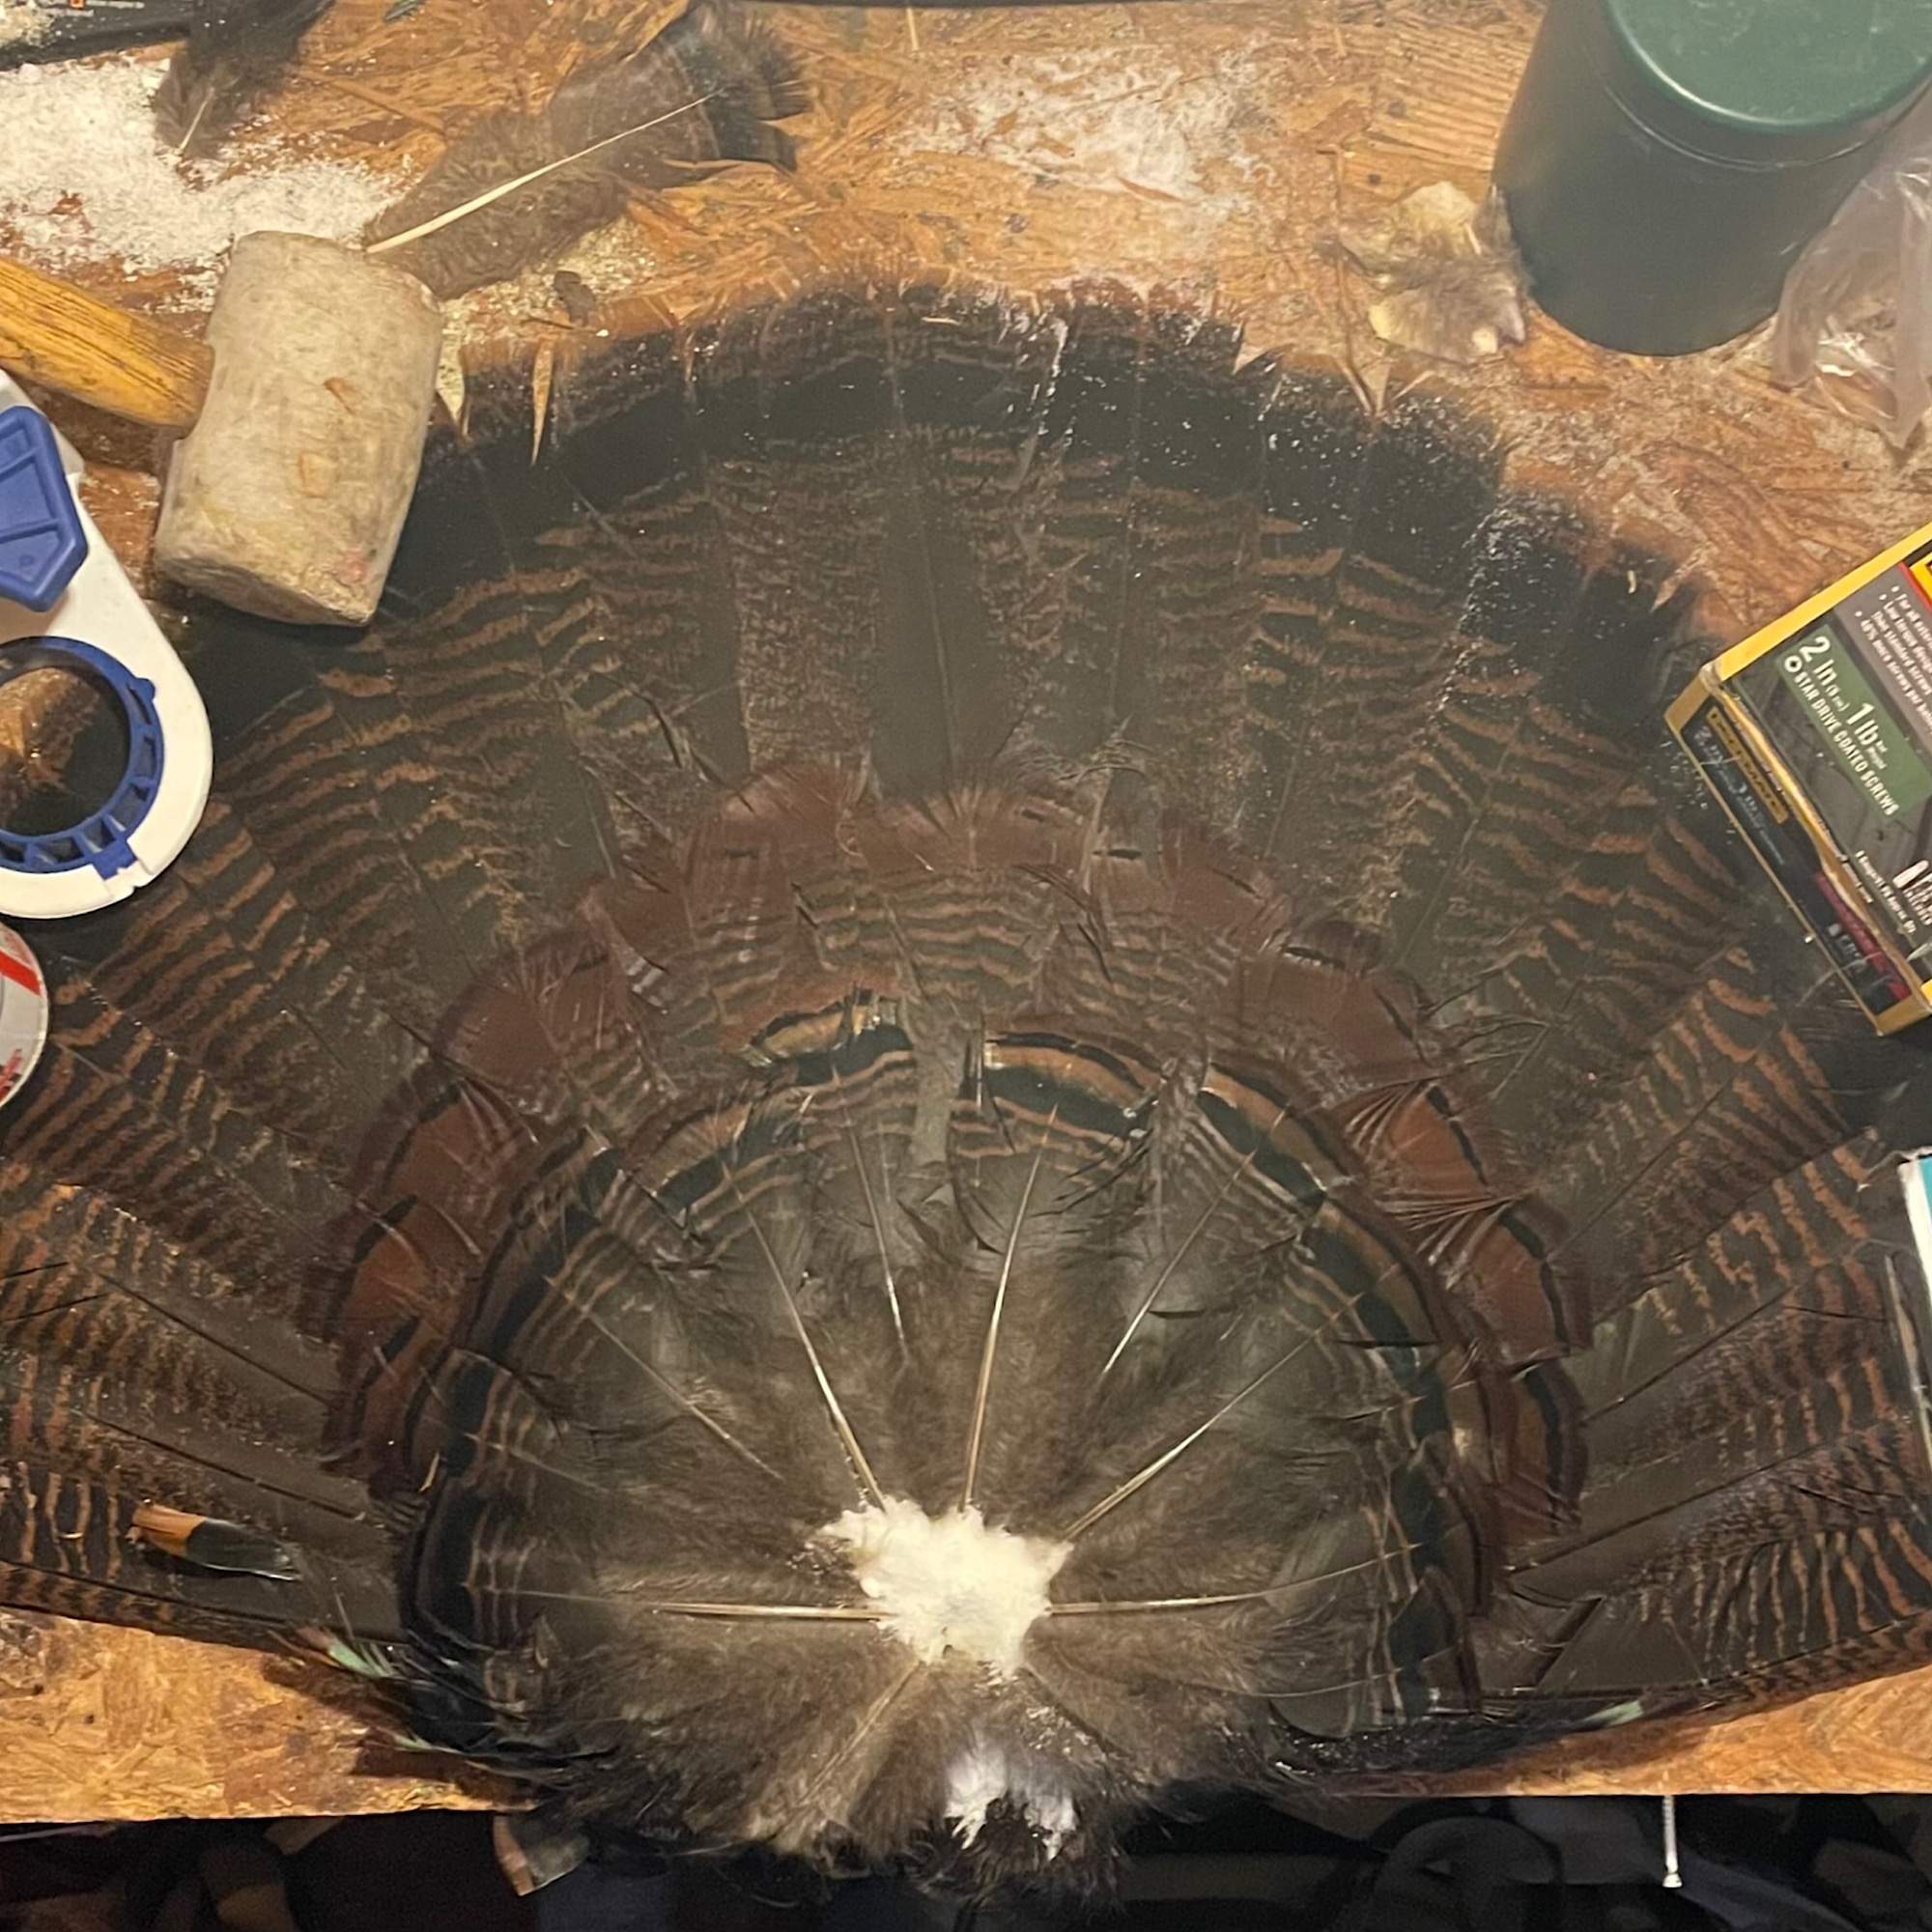
You’re going to want to trim as much fat away as possible. Trim all around the base of the tail fan and even trim in between the ends of the feathers where feasible.
This will allow you to go ahead and mount the fan without having to wait weeks and weeks for the fat to all dry out.
Bondo (Body Filler) is Key
Yes, you read that right. You’ve probably heard of using salt for drying out the fat, but you may not have heard of using Bondo, otherwise known as automotive body filler.
As you’ll see in the video below, Bondo is used to secure the tail fan in the fanned out position.
You can let the fan sit fanned out for a few weeks with the base covered in salt to dry out, and then use Bondo to secure it in the fanned out position.
The Bondo also gives you a hard backing to screw your turkey fan mount into. So, whether you let the fat dry out for weeks, or you trim it all away for a quicker install, Bondo is key.
Refer to the video below for a visual reference, but know that Bondo begins drying quickly, so get your feathers just how you want them fast.
You don’t have to purchase Bondo in large quantities from a store. You can get a smaller and cheaper quantity here.
Screw to the Plaque
You’re done with the hard part. Now, all you have to do is follow the instructions given by the turkey fan mount manufacturer and screw the plaque to the bondo.
Mount your beard(s) and spurs or feet is applicable and you’re done! You’ve mounted your turkey fan.
H.S. Turkey Fan Mount Video
How to Preserve Turkey Feet
Figuring out how to preserve turkey feet was a bit of a “let’s see how this goes” adventure for me, and it actually went well from the start.
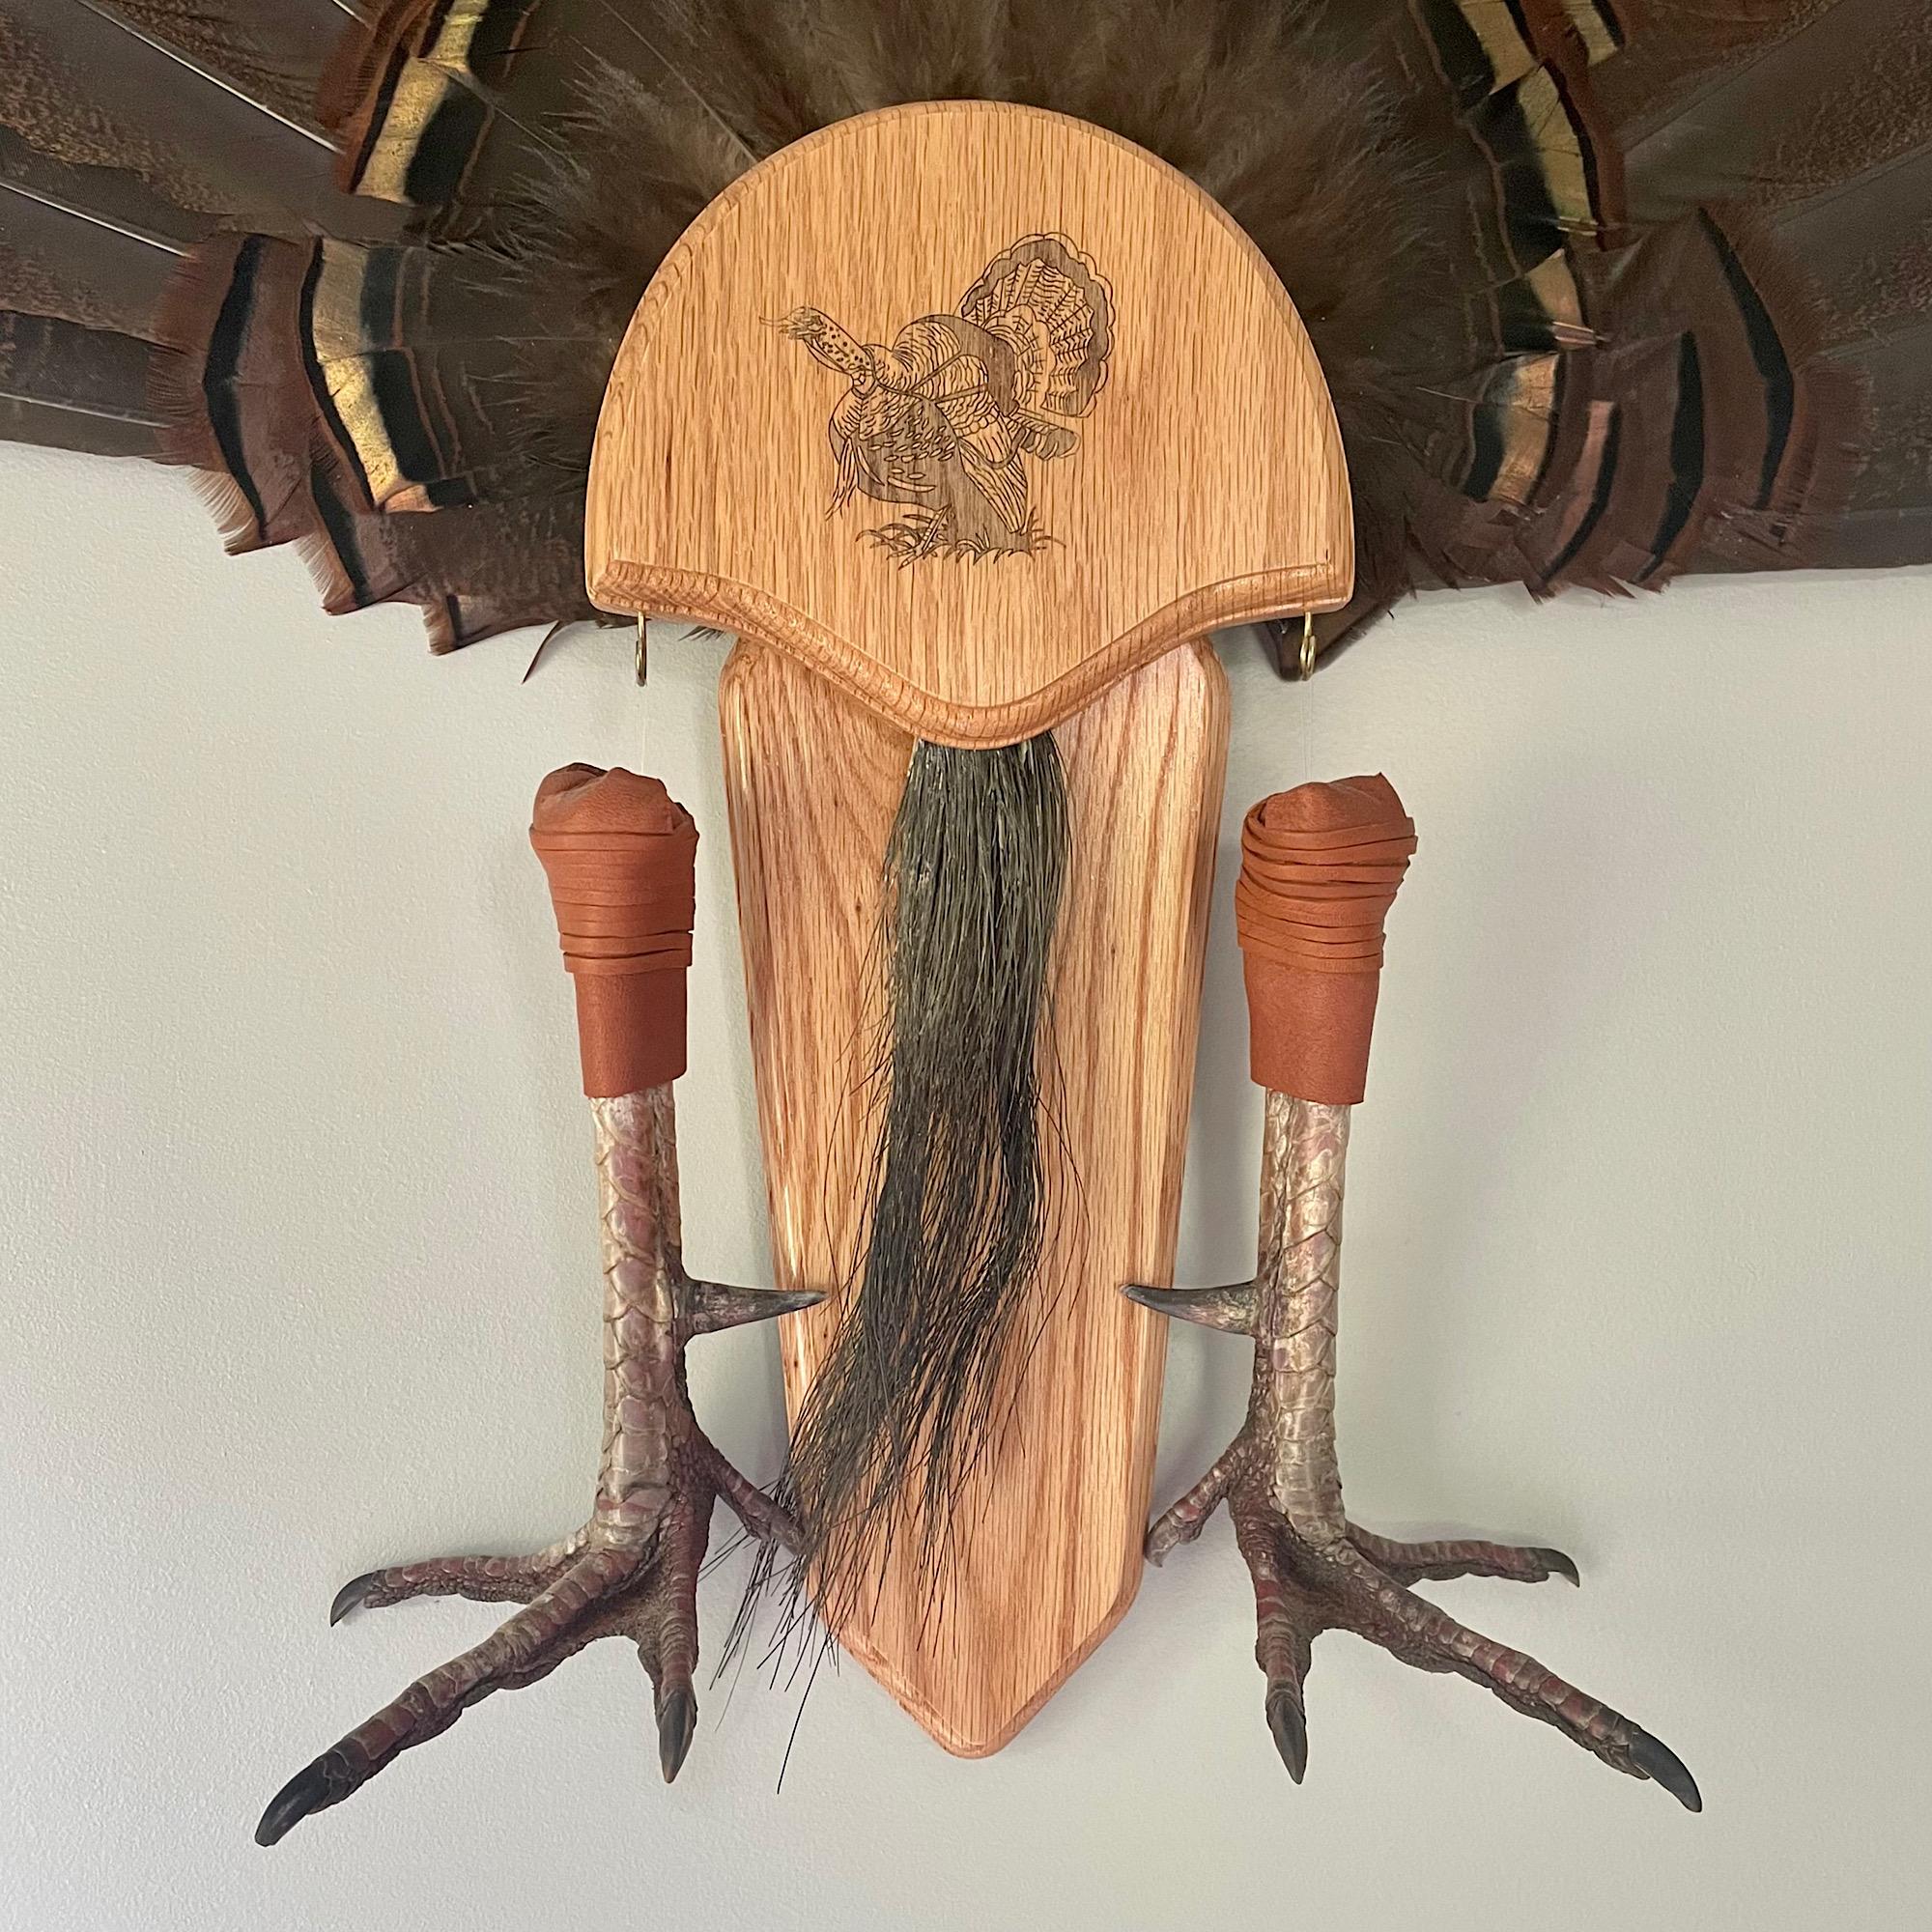
Cut Them to Length
I simply used a hacksaw to cut my turkey feet to the length that I like, and like the turkey fan, I used salt to dry them out.
Curled Up or Stretched Out
I didn’t want my feet to harden curled up. Instead, I wanted them to be stretched out naturally. If you want them to be curled, simply turn them upside down in a cup of salt, so the meat can dry, and you’re done.
If you want them stretched out and open like they’re walking, you’ll need to press them down firmly while backing them up against a hard surface, such as a wall, and place a pretty heavy weight straight down on the part of the foot where it meets the leg.
If you don’t place a heavy enough weight on the foot, it will immediately slide away from the wall, fall down, and curl back up.
Then just keep salt on the open meat where you cut the legs to dry them out. You’ll need to let the legs dry for several weeks, adding salt as needed.
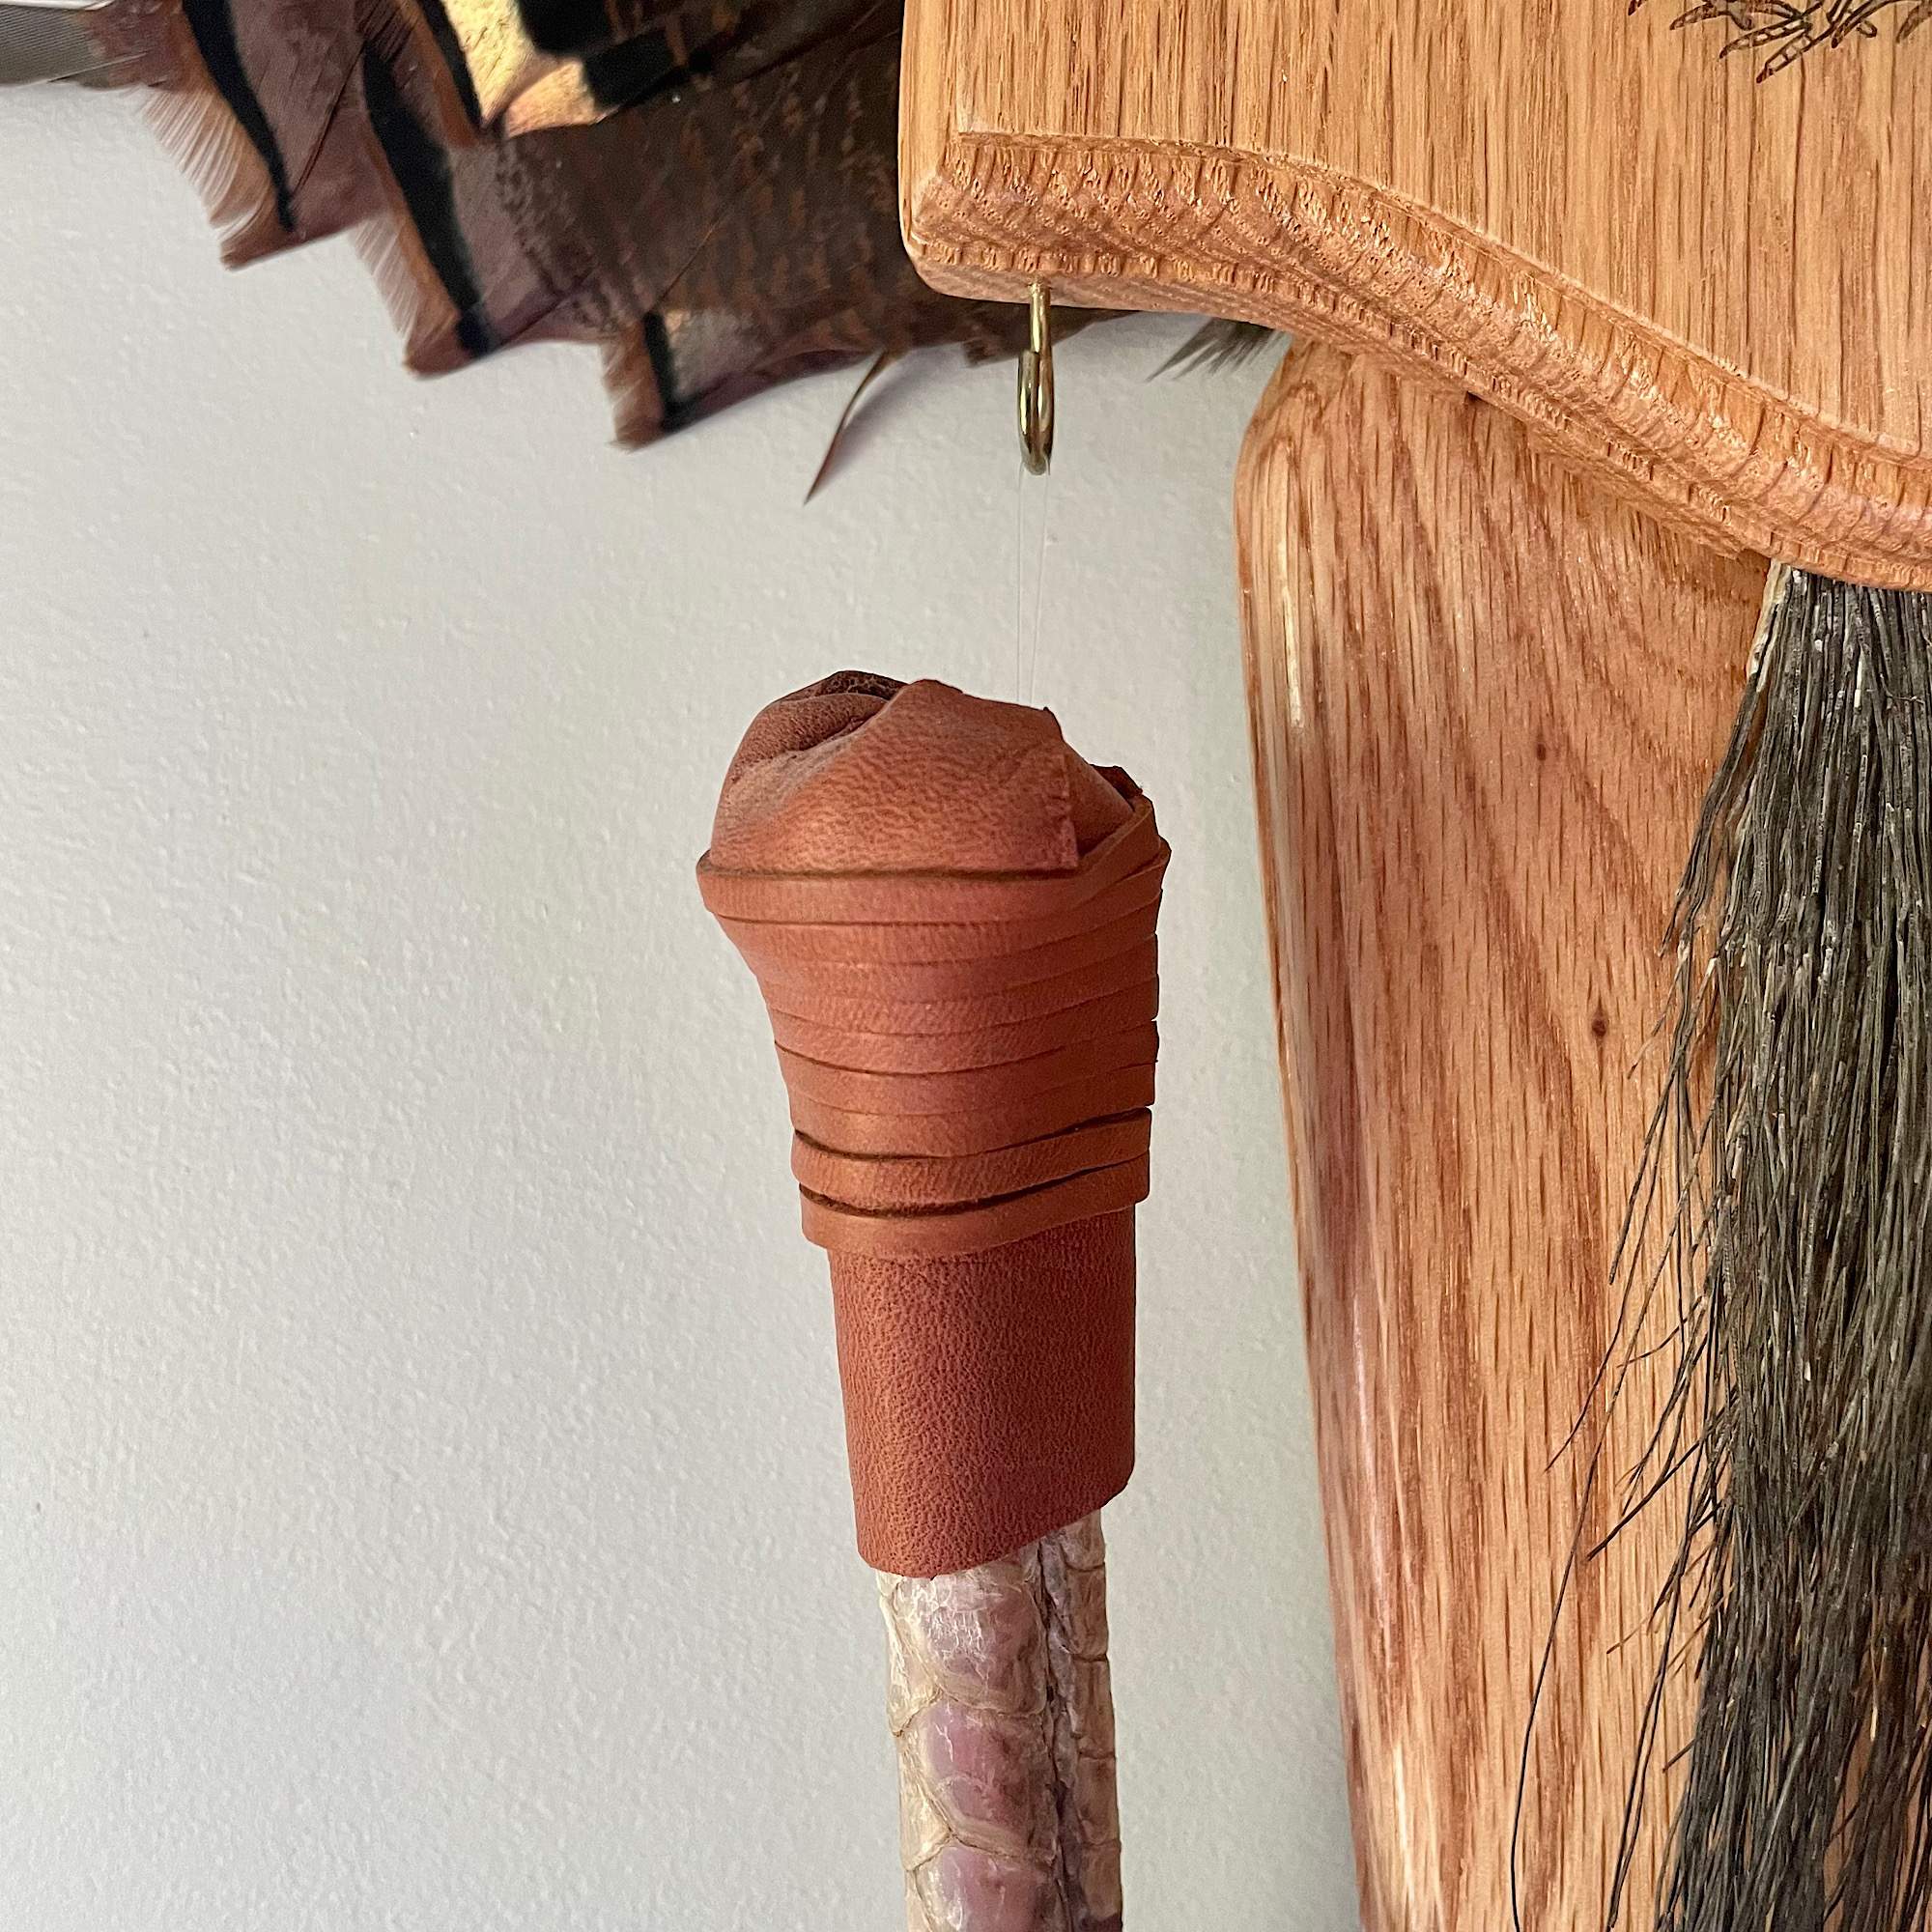
Cover With Leather and Display
Once the legs have dried and hardened in the position you liked, take a leather or pleather fabric, cut it into a square, pull it taut over the top of the leg, and wrap it nicely with a leather string or lace to secure it over the top of the feet.
I purchased a small swath of leather cloth and the leather lace from Hobby Lobby. It was cheap and made my turkey feet look professionally preserved.
Once you’re done covering the top of the leg, take a short piece of clear dental floss, super glue one end to the back of the leather cloth, and wrap the other end around the hook on your mounting plaque if it has one.
Do the same to the other and you’re done! If your plaque didn’t come with additional hooks, you can simply stand the feet up on a flat surface for displaying.

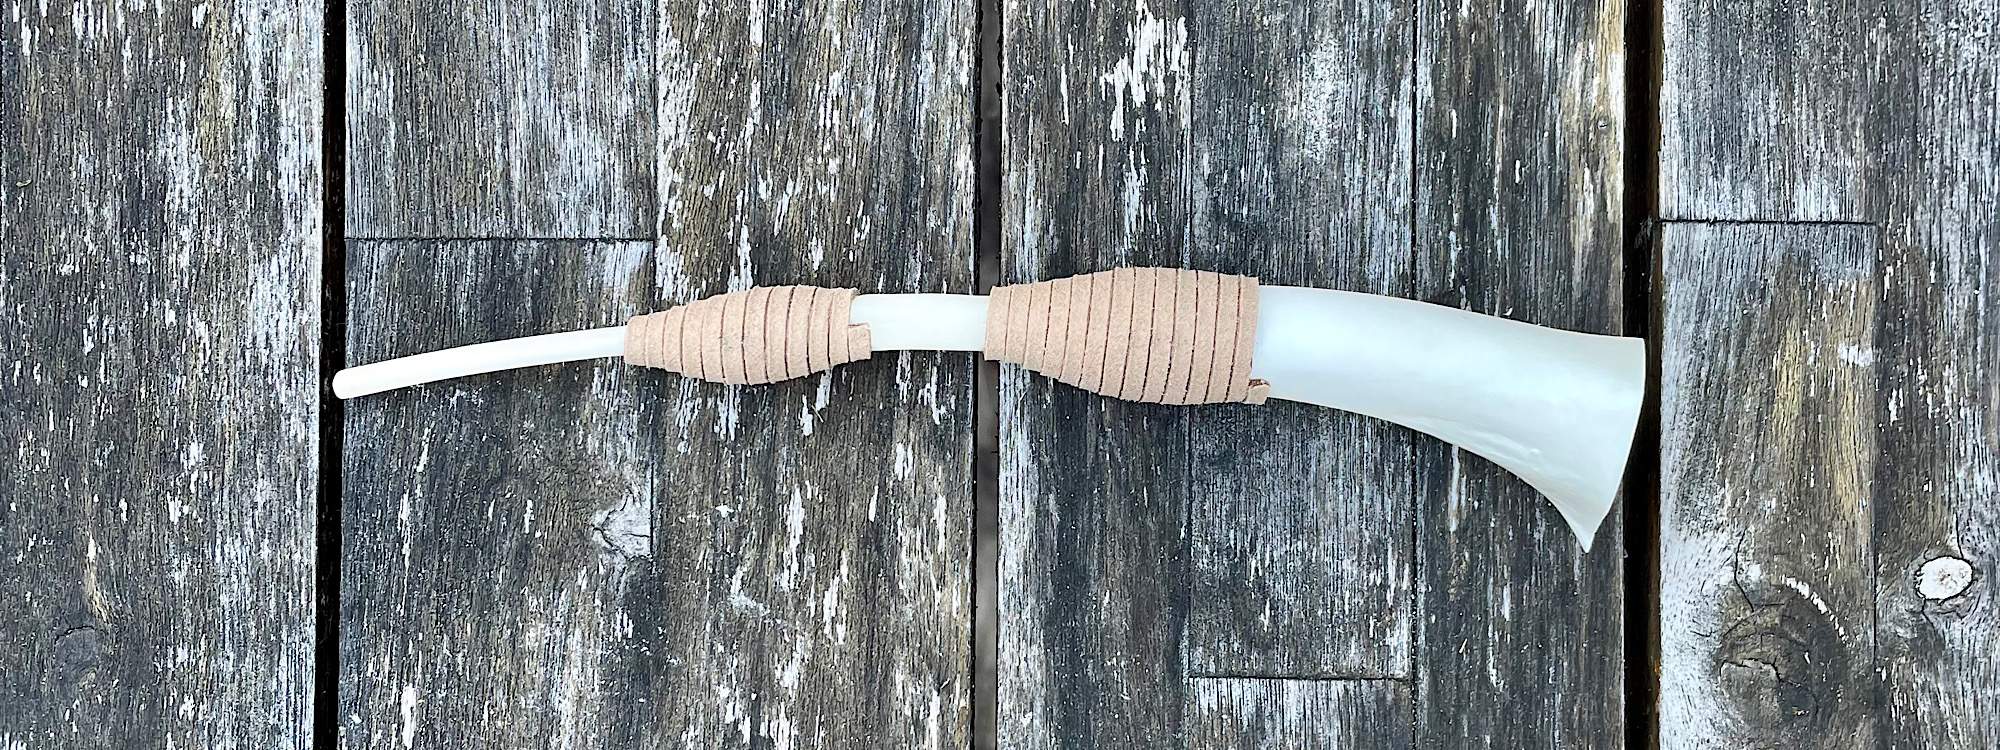
How to Remove Turkey Spurs
To remove turkey spurs, simply use a hacksaw to cut just above and just below each spur. Then, use a knife to cut away all the meat from the bone that holds the spur.
There will still be bone marrow inside the bone. Simply use something thin enough to fit inside the bone to press the marrow out of one side.
Then, rinse it all clean and you’re done! The bone will dry inside and out and you’ll be able to thread through the bone for hanging.