Knowing how to fletch an arrow is an invaluable skill that every bowhunter should have in their proverbial toolbox.
As an archer hones their skills and begins to shoot tighter groups, their fletching – or vanes – inevitably become damaged from making contact with field points or broadheads.
It’s costly in both time and money to drive to the nearest pro shop every time a vane is damaged. So, knowing how to fletch an arrow is almost a necessity for the serious bowhunter.
Also, it’s a fun and easy entry point into the world of tinkering with your archery setup.
How to fletch an arrow:
- Set your jig.
- Remove old vanes/wrap.
- Prepare vanes for adhesion.
- Adhere your vanes.
- Let them cure and test.
Need help understanding some of the terminology? Jump to definitions.
Learning How To Fletch An Arrow Is Easier Than You Think
Building arrows may seem scary at first, with all the different design options available – offset, helical, 3-fletch, 4-fletch, etc.
However, you need to realize that much of arrow building is trial and error. And by trial and error, I mean fletching your arrows in a certain configuration, shooting them, and seeing how well they shoot against other configurations.
If you simply want to go back with what you’re already shooting, it can be extremely easy. With that, I mean if you’re shooting a 2° right offset 3-vane configuration, you could simply strip the vanes and go right back with that same setup.
For sake of simplicity, that’s exactly what we’ll do here. So, let’s get started.
Set Your Jig

Because there are so many different styles of jigs, as well as vane configurations, we’ll simply choose one here, but the process will translate to any jig and any vane configuration.
The process we’ll walk through will pertain to a 3-vane configuration, using a Bohning Pro Class jig with a right-helical clamp. The jig comes set up for a 3-vane configuration, but includes adapters for a 4-fletch as well.
So, the only thing to set up right out of the box is the offset/helical. We’ll set it to 2°.
Remove Old Vanes/Wrap

If you’re not starting with a bare shaft, you’ll need to remove the old vanes or the old wrap with vanes attached.
If your shaft is wrapped, soak the wrap in warm water to loosen the glue, then peel the wrap off.
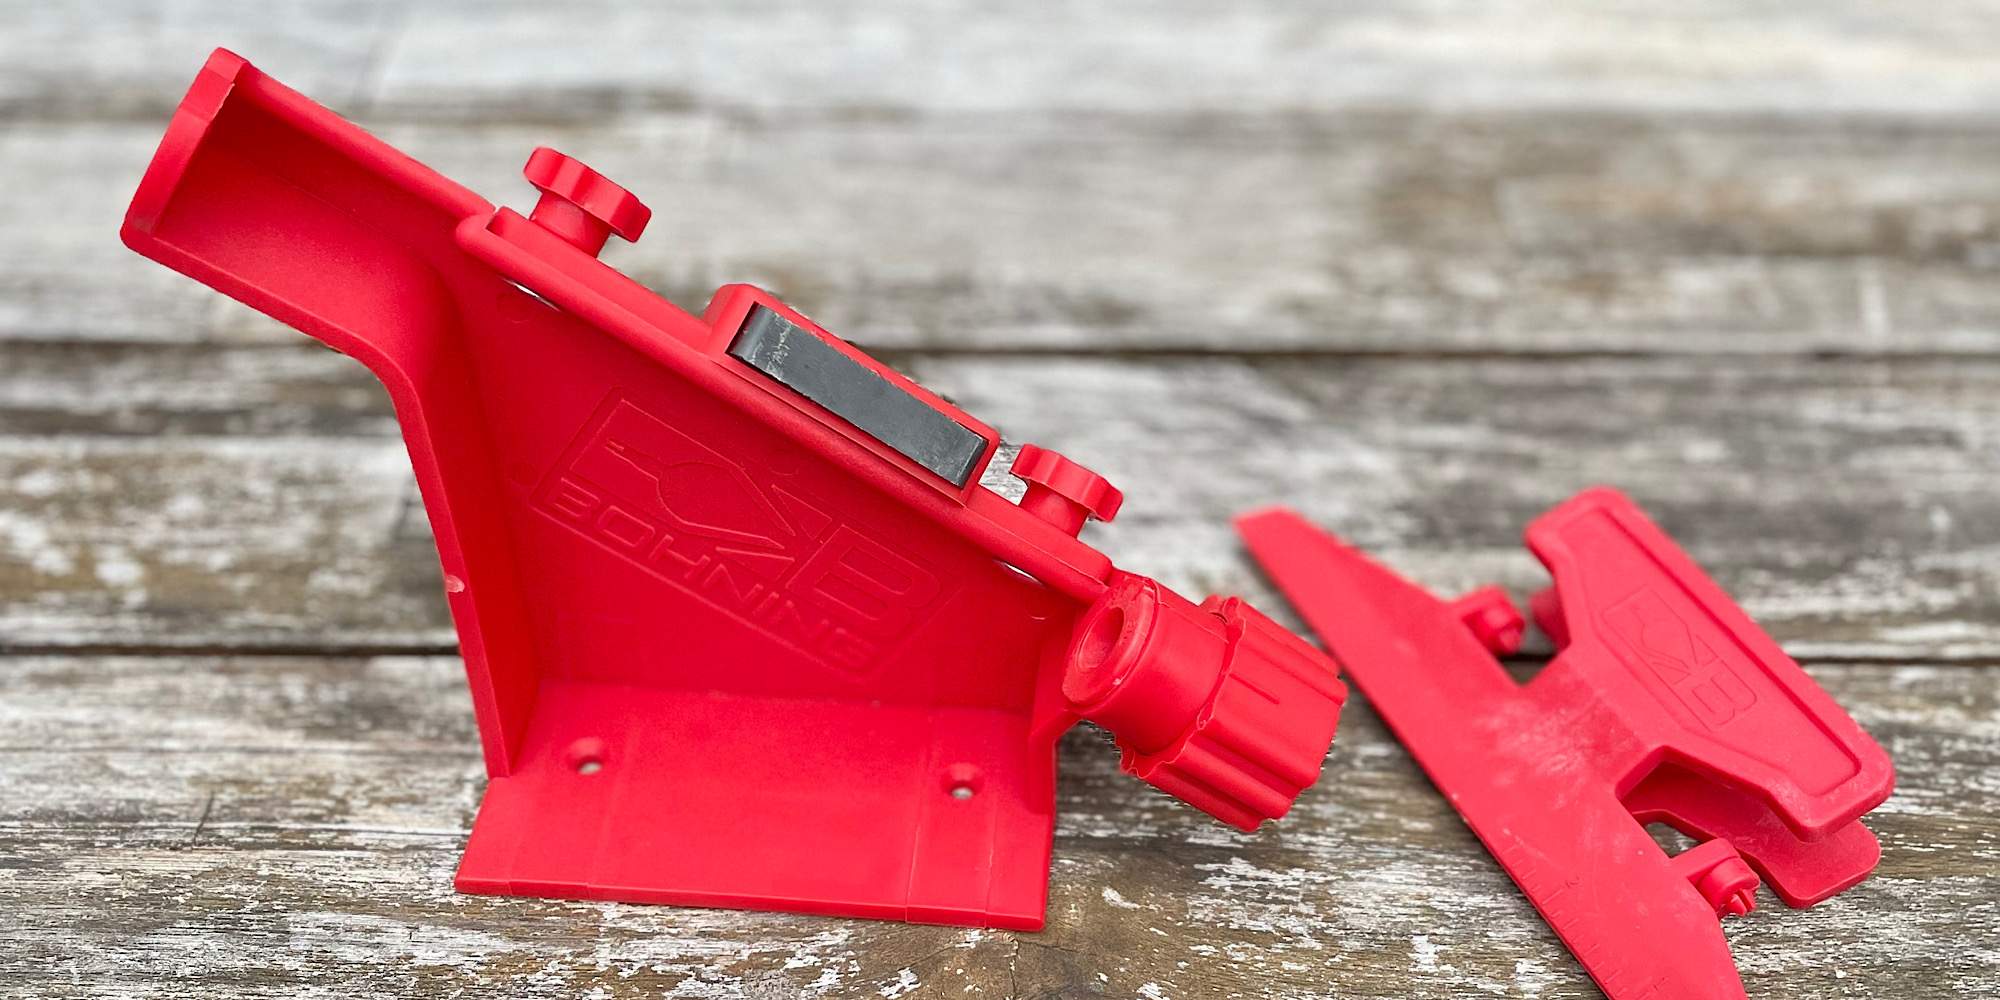
If your vanes are glued straight to the shaft of your arrow, use a fletching removal tool, such as The Strip-Pro by Bohning, to strip the vanes from the shaft.
Make sure the beveled edge of the blade is facing upward and do not dig into the shaft of the arrow. Work the removal tool away from your body.
Once the vanes are removed, continue to scrape the rest of the glue away.
Once all glue has been removed from the shaft, apply rubbing alcohol to remove oil from the shaft.
If you are going to apply a wrap to the arrow shaft, now is the time. Simply follow the steps outlined here.
However, if you’re glueing vanes straight to the shaft, go ahead and place it in your fletching jig, oriented so that your index vane will be the first vane glued on and perpendicular to the slot in your nock.
Prepare Vanes For Adhesion

Place your first vane in the clamp. The Pro Class jig clamp has markings that tell you how far from the nock your vanes will be. Make sure to place each vane against the same marking so they are each the same distance from the nock.
Pre-fletched, store-bought arrows typically have vanes 1″ from the nock. You can go back with that or experiment a little in either direction. Learning how to fletch an arrow gives you the ability to experiment and optimize your arrows for your setup.
Once your vane is in the clamp, rub the bottom of the vane (the side that adheres to the shaft) with rubbing alcohol to remove any oil from handling.
Then, if you are going to use a primer, apply it now as directed by the manufacturer.
Adhere Your Vanes


Once you’re ready to glue on a vane, apply a small amount of adhesive to the vane. It takes much less than you would think, and it is extremely easy to use too much.
What I like to do is put 4 or 5 evenly-spaced gel drops of Loctite Super Glue UltraGel Control along the bottom, then use the tip of the bottle to smear it into a thin layer along the entire channel.
Next, simply place the clamp onto the jig to where the vane is fully seated onto the shaft, with the side of the clamp magnet pressed against the jig magnetic. Press down gently for around 10-15 seconds to allow the adhesive time to work.
I typically hold the shaft in place with one hand while depressing the vane with the clamp in the other because with the Pro Class, if you press too hard, the shaft will move a little, causing each vain to be a little bit off from where they were supposed to be.
It just takes a little practice to get it right. Once you have installed your index vane, it’s time to simply rotate the dial on the jig and repeat the process. Do this until your arrow is fully fletched.
Inspect all vanes to make sure they are evenly spaced, the same distance from the nock, and have the same offset. If you don’t see any inconsistencies, you’re almost done.
Let Them Cure and Test

Let the adhesive – even super glue gel – cure for 24 hours or so. Just lay your shafts across a table with the fletching end hanging off so there isn’t any force pressing against them.
You’ll then want to shoot them and make sure they’re grouping well and that there aren’t any flying erratically. If you do notice you have an arrow flying differently, examine the vanes thoroughly to make sure you didn’t miss something during your previous inspection. Correct any issues you may find and retest.
If all goes well, congrats! You’ve learned how to fletch an arrow, and you’ve done it successfully. If it didn’t go perfectly, don’t worry. It’s as much an art as it is a science. It takes time to become proficient at it. Just keep at it and your arrows will get better and better.
Fletching Terminology
Learning how to fletch an arrow takes an understanding of some of the common words associated with it. So, let’s take a look at some of the basic terminology that you may run into as you jump in.
Fletching Jig

A fletching jig is the most important piece of equipment for fletching an arrow. It’s the actual device that holds an arrow and allows you to glue your vanes onto the shaft in your desired configuration.
There are several different styles offered by many different manufacturers. I use the Bohning Pro Class jig. It’s simple to use and allows you to fletch straight, or up to 2° offset with a right or left helical.
Another great option is the Bitzenburger Fletching Jig. It’s pricier than the Bohning, but its quality is trusted by professionals, such as John Dudley of Nock On Archery.
You can find my list of the best fletching jigs on the market here.
Vanes vs. Fletching

As a noun, vanes and fletching are interchangeable, with vanes being more of a North American term. So, learning how to fletch an arrow means learning how to adhere vanes to an arrow shaft. Easy enough.
Offset/Helical

You’ll often see the words offset and helical with regards to vanes. Each one is referencing the amount of degrees that a vane (or fletching) wraps around the arrow shaft.
Offset is generally thought of as very slight, up to 2°, while helical is thought of as being anything more than that. In essence, though, the terms refer to the same thing and are interchangeable. An offset of 1° is really just a slight helical.
And the more helical that an arrow has, the faster it will spin the arrow, which helps “spin out” arrow and/or tuning imperfections.
Obviously, arrow spin can only help so much in this regard, but you get the point.
Index/Cock Vane

The index vane – or cock vane as some call it – of a 3-vane arrow is the vane that points straight up when nocked. It’s typically a different color. The purpose of an index vane depends on your style of rest.
On a whisker biscuit rest, such as the Trophy Ridge Kill Shot, an index vane allows for equal distribution of force on all 3 vanes. The bottom bristles on a Kill Shot are more rigid than the rest, so you don’t want to send a vane through them.
If you did, more force would be exerted on that vain than the other two, causing inconsistent results.
On a drop away rest, the purpose for indexing up is to have the greatest clearance you can.
The index vane goes away as you move away from 3-vane designs. Vane clearance is still an issue with more vanes, but one that can’t be solved by facing one vane upward.
Fletching Primer

Fletching primers usually come in the shape of a fletching pen, so that you can easily apply the primer to the bottom of vanes before gluing them to a shaft.
The primers clean the surface of the vanes and prepare them for glue. There are several primers on the market. Some vane manufacturers require primer on their vanes to assure proper adhesion to the shaft.
Many archers have complained of certain brands’ vanes coming unglued when not primed. I personally use Bohning Blazer and Heat vanes and have never used a primer on them, and I’ve never had a vane come off.
Adhesive

It seems that just about every vane manufacturer makes their own adhesive to go with their vanes. Some adhesives are quicker setting than others, and all serve the same purpose – to keep the vanes attached to the shaft.
I prefer, as do many other bowhunters/archers, to simply use a super glue gel. My glue of choice is Loctite Super Glue UltraGel Control. The gel gives you more control over the application and doesn’t dry as instantaneously as regular super glue.
Arrow Wraps
WorldArchery.sport describes arrow wraps perfectly by saying:
Wraps are used for arrow identification, labelling shafts with your name and a number, protecting the shaft from fletching adhesive, reliable vane markings – and, last but not least, making your snazzy gear stand out from the crowd!
Arrow wraps are not required, but can be helpful when refletching your shafts. Simply soak the wrap end of the shaft in warm water and peel the wrap off, which will bring the vanes with it.
There are pros and cons to using vs. not using arrow wraps. Without wraps, there are less steps and expenses involved on the front end, but it takes longer to strip all the glue off a shaft on the backend. Also, you can unintentionally scrape shavings off your shaft with each fletching job.
Personally, I don’t use wraps, but the more I refletch my arrows and see the carbon dust I’m scraping off, the more I’m entertaining the thought of using them.
If you’re thinking of using wraps, you can find an easy guide for installing them here.
Questions and Comments
If you came here to learn how to fletch an arrow, I’d love to hear if this was helpful or not. Leave any questions or comments below! You can also find me on Instagram or Facebook @southeasternbowhunting.